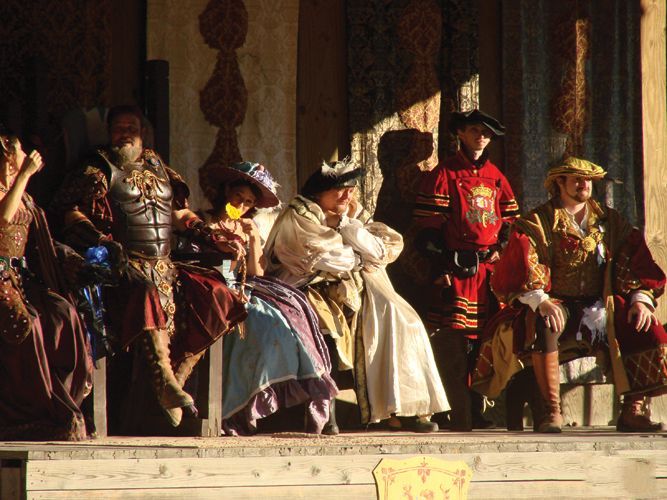
我的工作(裁剪和调整)参考照片在我的iPad,保持我的画架旁边。
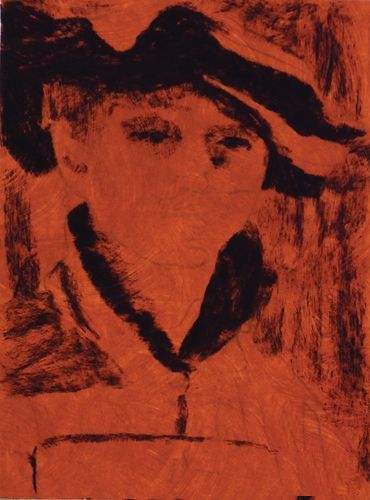
步骤1
我先从最黑暗的值(在本例中,特里路德维希茄子)。
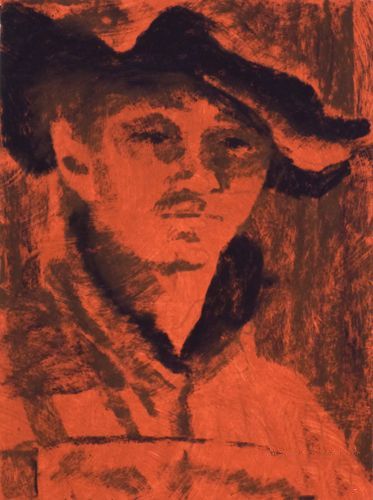
步骤2
然后我躺在接下来的黑暗的价值观,开始与一个深绿色。
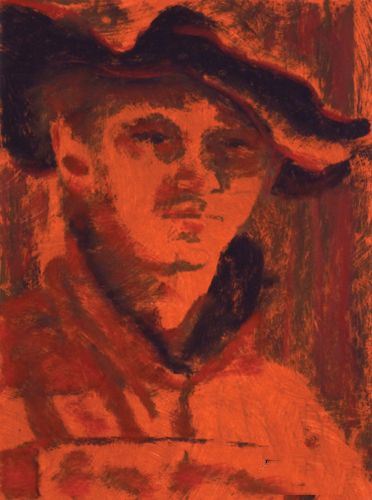
步骤3
我继续躺在黑暗的值和深红色。
步骤4
前进之前过于黑暗和媒介,我想关键在基地的语气我光区,所以我要知道其他的值将如何反应。
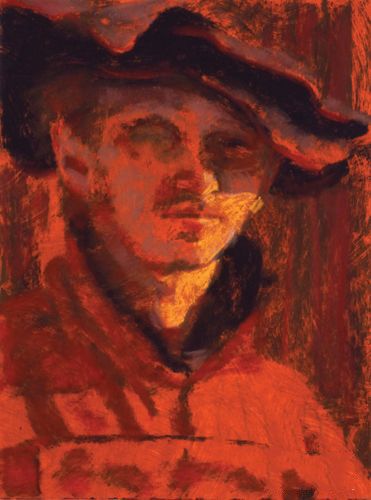
步骤5
有时我需要修改当我向前去。在这里,我纠正了左眼的位置和恢复一些黑暗的黑暗。
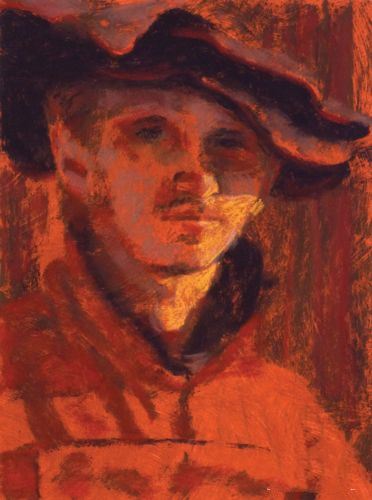
步骤6
我继续建立各种温度在整个绘画的中间调。
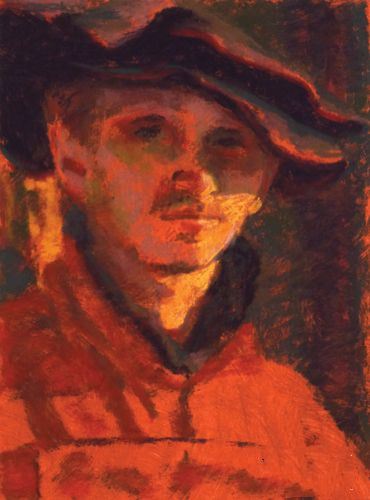
步骤7
我工作在我的中间调在清凉的上突出黑色。
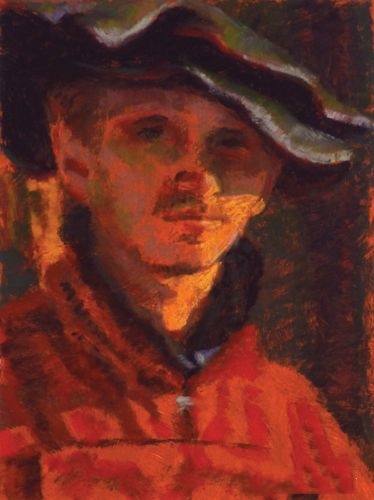
步骤8
我添加更多的中间调的定义特性。
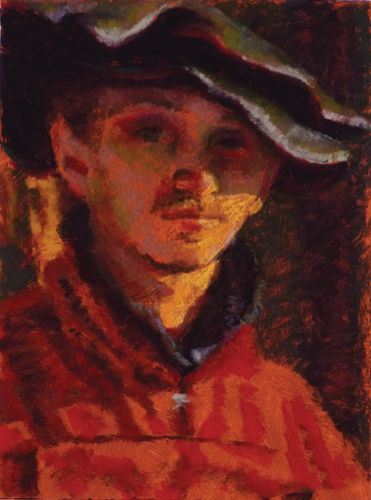
步骤9
与一系列的颜色稍浅的价值观,我釉层,下对面慢慢收紧我的渲染。在这里,我添加按钮和温暖了亮点。
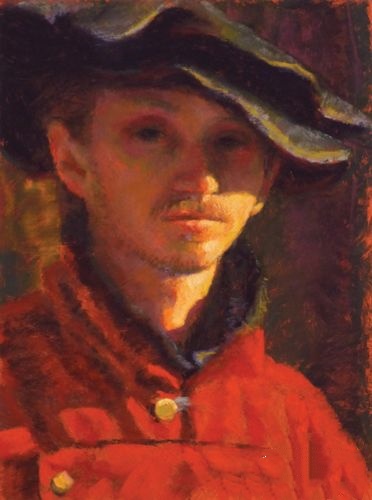
第十步
我做一些最后的调整冷却阴影和添加更深的红色的外套。经过两天的休息时间,我通常回去在修改,我回到扩大左领进一个形状,似乎更合乎逻辑。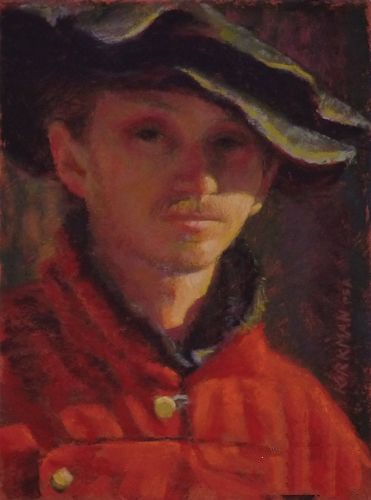
油漆完
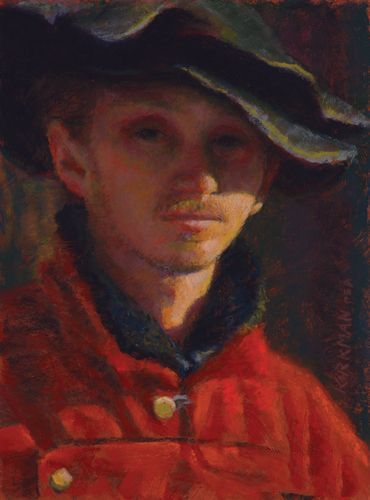
国王的卫队(崧,8×6)丽塔教徒
原文如下
REFERENCE PHOTO
I work from the (cropped and adjusted) reference photo on my iPad, keeping it next to my easel.
STEP 1
I start with the darkest value (in this case, Terry Ludwig Eggplant).
STEP 2
I then lay in the next darkest values, beginning with a dark green.
STEP 3
I continue laying in dark values with a dark red.
STEP 4
Before moving along too far with the darks and mediums, I like to key in the base tone of my light area, so I’ll know how the other values will react to it.
STEP 5
Sometimes I need to revise as I go along. Here, I corrected the position of the left eye and reestablished some of the darkest darks.
STEP 6
I continue to establish the various temperatures of midtones throughout the painting.
STEP 7
I work on my midtones in the cool highlights on the black.
STEP 8
I add more midtones in the definition of the features.
STEP 9
With a series of slightly lighter values, I glaze across the under layers, slowly tightening up my rendering. Here, I added the buttons and warmed the highlights.
STEP 10
I make some final adjustments to cool down the shadows and add deeper reds in the coat. After a couple of days’ rest I typically go back in to revise; I went back to widen the left collar into a shape that seemed more logical.
FINISHED PAINTING
King’s Guard (pastel, 8×6) by Rita Kirkman


