画海景和大气级数
与约翰·p·奥斯本
有一个公式的类型确定微妙的大气的进展颜色和颜色值。“无论我们绘画和多么重要人物,静物或景观”,奥斯本说,“有一个光的平均价值和一个影子平均价值,当你添加半色调之间的两个,或者中间值的调色板,你有形式。你不可能的幻想出光或把你的画布,人生没有形成。“请按照本教程山水画作为约翰·p·奥斯本说如何画风景或海景。
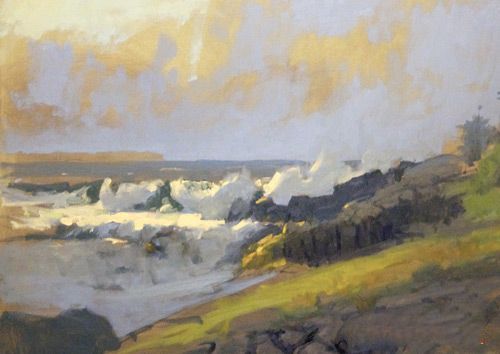
Harpswell岛(油、44×60)
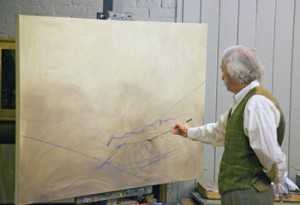
步骤1:调色画布
我通常与我的画布语气阳光语气温暖的灰色(象牙黑、白和一个小橙);你把阴影后,剩下的就是阳光基调。这里我开始快速布置草图和建立最高的光大约三分之一,在某个地方,在画布上。除此之外,作为一个姿态,这让我找出如何让眼睛移动的帆布。
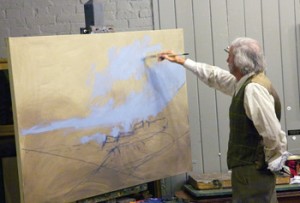
步骤2:从云
在这种情况下,因为天空占据了主要部分,这幅画,我把它第一。从云端的阴影,我使用一个混合的钴蓝色,黑色和白色象牙。
步骤3:混合岩石中
后躺在阴影部分的天空,使用相同的颜色在步骤2,我下一个混合颜色深一点的值来躺在岩石。
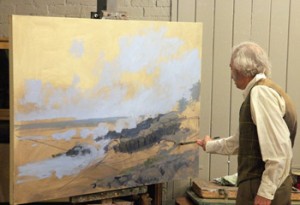
步骤4:添加颜色值
一旦岩石在的地方,我开始解决绿色前景将在一些颜色来代表开始阳光的价值镉黄深(阳光灰色、白色、黑色、深蓝色、镉黄灯)。我也加了一些深色的口音。
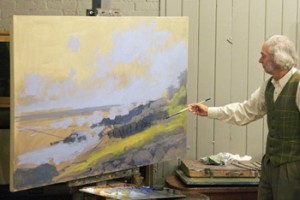
步骤5:铺设天空
我接下来开始躺在清澈的天空的一部分。你可以看到优美的帆布有助于发展。如果我认为它在绘画作品,我会让一些语气显示通过,甚至允许一些这是左原状。
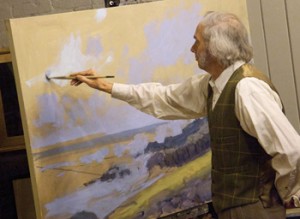
步骤6:最高的光
最后我申请最高的光。此时,如果值是在正确的地方,最高的光读真正的,你不需要重新绘制你所做的一切。这是主要的优势和合作准备调色板。
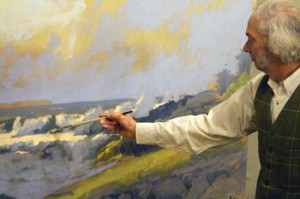
步骤7:收尾工作
我画这一块作为一个示范。因此,我带着它到我能在规定的时间内。示威游行后,我的目标是要把它完成以同样的热情和兴奋,我开始用。在接下来的几周,我看着它更多的批判性和微妙的变化,但从根本上Harpswell岛(油、44×60)被设置。
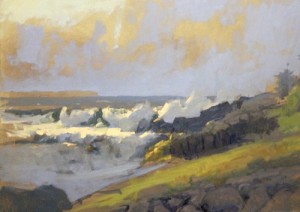
Harpswell岛(油、44×60)
原文如下:
Painting Seascapes with Atmospheric Progression
with John P. Osborne
There’s a formula of sorts for determining the subtle atmospheric progression of colors and color values. “No matter what we’re painting and how important the figure, still life or landscape,” Osborne says, “there’s a light average value and a shadow average value, and when you add the halftone between the two, or the middle value of the palette, you have form. You can’t create the illusion of light or bring your canvas to life without form.” Follow along in this landscape painting tutorial as John P. Osborne explains how to paint landscapes or seascapes.
Harpswell Island (oil, 44×60)
STEP 1: TONING THE CANVAS
I usually tone my canvas with a sunlight tone—warm gray (ivory black, white and a little orange); after you put shadow in, what’s left is a sunlight tone. Here I began a quick placement sketch and established the highest light somewhere about one-third up and in, on the canvas. Aside from that, as a gesture, this allows me to figure out how to get the eye moving in and out of the canvas.
STEP 2: STARTING WITH THE CLOUDS
In this case, since the sky takes up a major portion of the painting, I placed it first. Starting with the shadows of the clouds, I used a mix of cobalt blue, ivory black and white.
STEP 3: MIXING IN ROCKS
After laying in the shadow parts of the sky, using the same colors as in step 2, I next mixed a darker value to lay in the rocks.
STEP 4: ADDING COLOR VALUE
Once the rocks were in place, I began to address the green foreground by putting in some of the color to represent the beginnings of sunlight in the value of cadmium yellow deep (sunlight gray, black and white, ultramarine blue, cadmium yellow light). I also added a few darker accents.
STEP 5: LAYING THE SKY
I next began to lay in the clear part of the sky. You can see how the toned canvas helps in the progression. If I think it works within the painting, I’ll let some of the tone show through and even allow some of it to be left undisturbed.
STEP 6: THE HIGHEST LIGHT
Finally I applied the highest light. At this point, if the values are in the right place so that the highest light reads true, you won’t have to repaint everything you’ve done. This is the major advantage of working with a prepared palette.
STEP 7: FINISHING TOUCHES
I painted this piece as a demonstration. As such, I took it as far as I could in the time allotted. After the demonstration, my goal was to try to bring it to a finish with the same enthusiasm and excitement that I began with. Over the following several weeks, I looked at it more critically and made subtle changes, but fundamentally Harpswell Island (oil, 44×60) was set.
Harpswell Island (oil, 44×60)


