

在准备这门课我决定做一个面板与阶段的肖像画。授予有尽可能多的方法来画肖像作为有艺术家画他们。所以这个演示的目的是为了画肖像在一个系统化的方法来学习,可能会吸引艺术家在所有级别。

有任何做得好画是最重要的方面的会理解所有的色相、色度值,将遇到的问题,一个作为绘画的进展。在这类学生将首先被要求做一个线性构造或“卡通”在纸上转移到画布前。像他们说,“好画好画。”
 起见
起见首先我想首先起见的头部。大体上我列举的最大高度和宽度和测量它们之间的相互关系。在这个阶段的每一行是一个近似,我愿意随时移动或改变。我觉得一个人必须从某个地方开始,如果没有在纸上没有正确的。
我花了很多时间在这个阶段的图纸。我不断完善并检查比例倾斜来创建一个令人信服的剪影。简单如我看它是基岩的我将建立自己的肖像。
 阻塞在功能 在花费大量的时间在起见我有足够的信息在工作场所的特征脸。记住最初的细化起见还没有完全完成我仍然可以继续了解我的专业倾斜都解决。从找到的角度和方向的中心线然后我可以开始测量高度的其他特性。我想先做一个标记,眉岭是考虑它是由骨和不可能移动。我的下一个测量来自眉脊底部的鼻子。此外我经常反复检查这些特性如何与外部起见确保所有的拼图组合在一起和谐。
一旦所有的功能是发现垂直然后我可以运行一个铅垂线方向的中心线找到宽度的所有特性。
 铰接起见
铰接起见在这上面你可以看到,我已经和铰接构造起见把人物模特。我用同样的方法在阻塞在阴影和我一样通过阻塞的头。大体上我素描的阴影后的形状是像外观构造精制。当建立终结者线或“臭虫线”的阴影我试图设想在我心中什么飞机转移或潜在的形式是生产某些光线影响。我想象的光环绕着形式和试图复制这种印象在我的页面。
 完成卡通
完成卡通在阐明阴影我健美他们比较形状对整个。一旦satifiy用图画,它准备转让.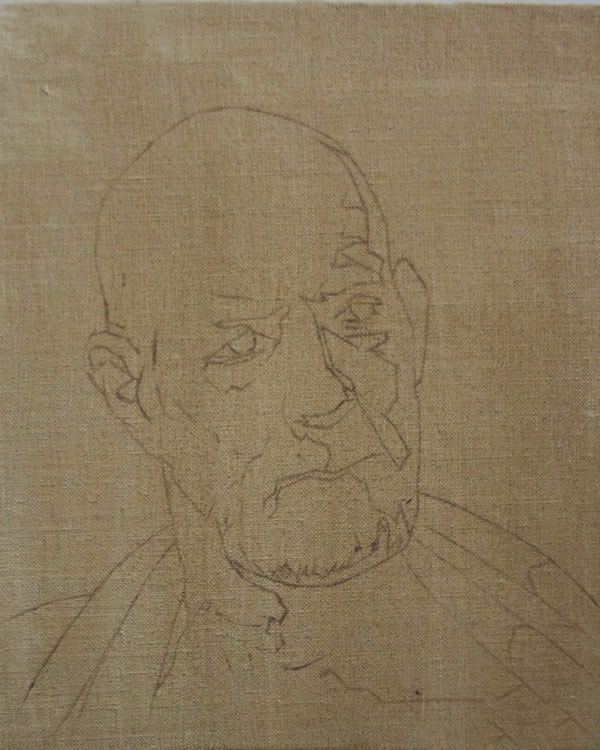 转让的卡通
转让的卡通
几天前我的一些亚麻与生赭和溶剂油。我擦下来,直到我能减轻它对一个值6。一旦语气干然后我转移我的卡通它。
 生赭洗白加剧
我洗了我的价值观压缩在一个半透明的语气对所有的阴影。相对于半色调背景略深所以我混合值适合它。铅白色我擦洗在光区牢记他们的关系形式和飞机。任何价值它们半驻留在我离开前音的亚麻布。然后我离开这个洗画晾干在我应用色彩
 控制面板
控制面板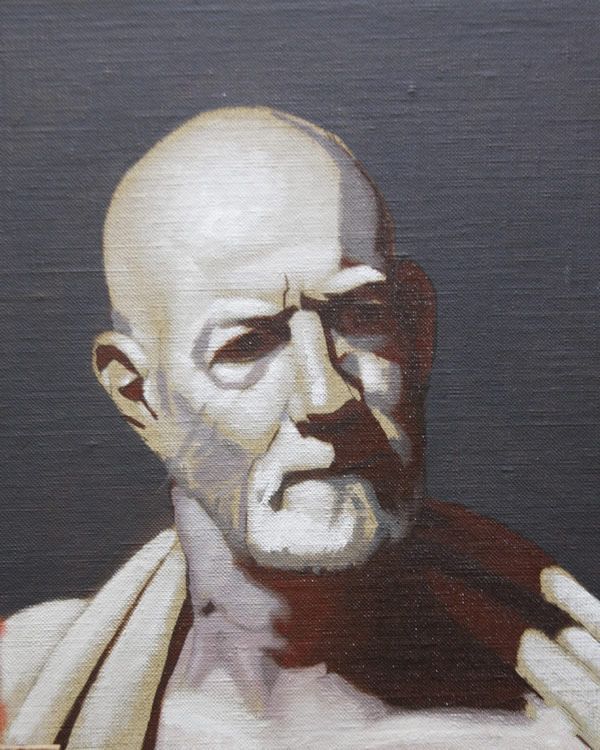 平面/然后
平面/然后我接近我的,然后考虑飞机的头部。我开始与影子,然后移动到它们半。当我想象形状的飞机我混个调与相对价值来飞机在它附近。在这一点上我不关心混合或建模的形式。如果这个值是正确的,那么意义上的形式将会发生的结果。
 完成平面/然后 在这个时候我想谈一谈关于油漆质量。了,然后是要薄。粗略的洗在这个阶段我稀释油漆混合1部分亚麻仁油和三部分松节油。我通常在我的介质蘸刷杯子,然后擦去多余的油从刷。其馀油在刷通常是足够薄的漆。
我对绘画这个薄淡的推理层是建立在一个快速的方法,所有的颜色之间的相互关系。有人可能会说自己这似乎很费力才能画出如此多的阶段。但对于一个没有经验的画家所有这些阶段可以帮助艺术家建立更牢固的结构来完成绘画存在。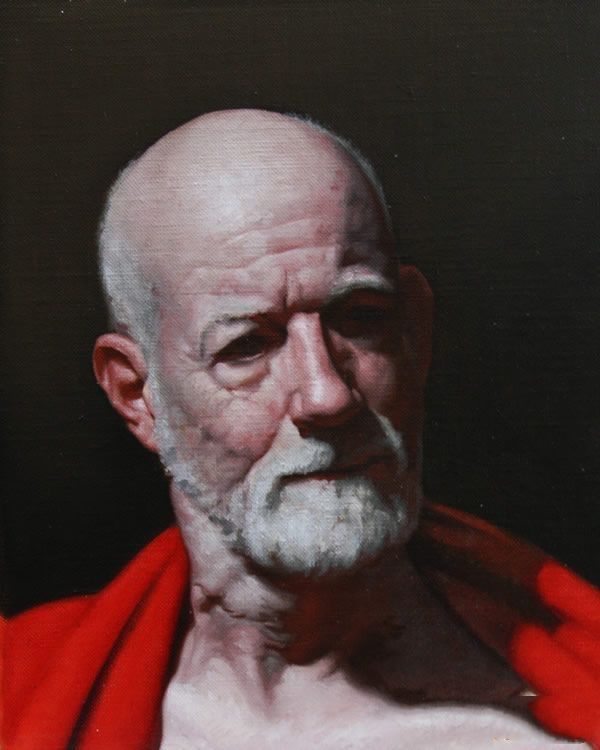 绘画形式
绘画形式
原文如下:
Demonstration II by Brian Macneil - Artist Website Artist Blog
In preparation of this course I decide to make a panel with the stages of a Portrait Painting. Granted there are as many ways to paint a portrait as there are artist painting them. So the goal of this demo was to paint a portrait in a systematic way of learning that could appeal to artist at all levels.
With any well done painting DRAWING is the most important aspect the will make sense of all of the Hue, Value, Chroma questions that one will come across as the painting progresses. In this class students will first be asked to make a linear construct or "cartoon" on paper before transferring it to canvas. Like they say,"well drawn is well painted."
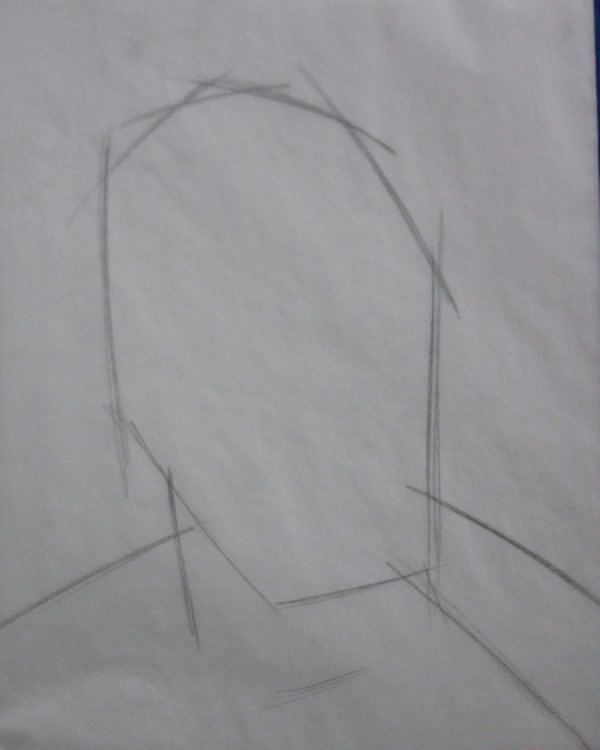
Block-In
First off I like to start with a block-in of the head. In a general way I tick off the largest height and width and measure their relationships to each other. At this stage every line is an approximation that I will be willing to move or change at any time. I feel that one must start somewhere and if there is nothing on the paper there is nothing to correct.
I personally spend a lot of time on this stage of the drawing. I constantly refine the tilts and examine proportions to create a convincing silhouette. As simple as it my look it is the bedrock of what I will be building my portrait.
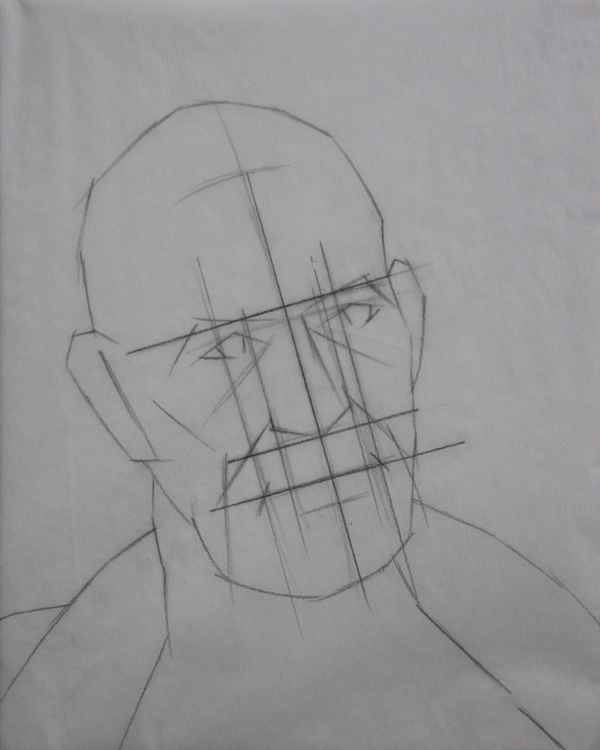
Blocking in the Features After spending a considerable amount of time on the block-in I have enough information in place to work on the features of the face. Keeping in mind that the refinements of the initial block-in are not fully completed I can still proceed knowing that my majors tilts have all been addressed. Starting with finding the angle and orientation of the center line I can then start measuring the heights of the other features. I like to start with making a mark where the Eyebrow Ridge is considering it is made bone and not likely to move. My next Measurement is from the Brow Ridge to the bottom of the Nose. In addition I'm constantly double checking how the features relate to the exterior block-in making sure all the puzzle pieces fit together in harmony.
Once all of the features are discovered vertically I can then run a plumb line in the orientation of the center line to find the width of all of the features.
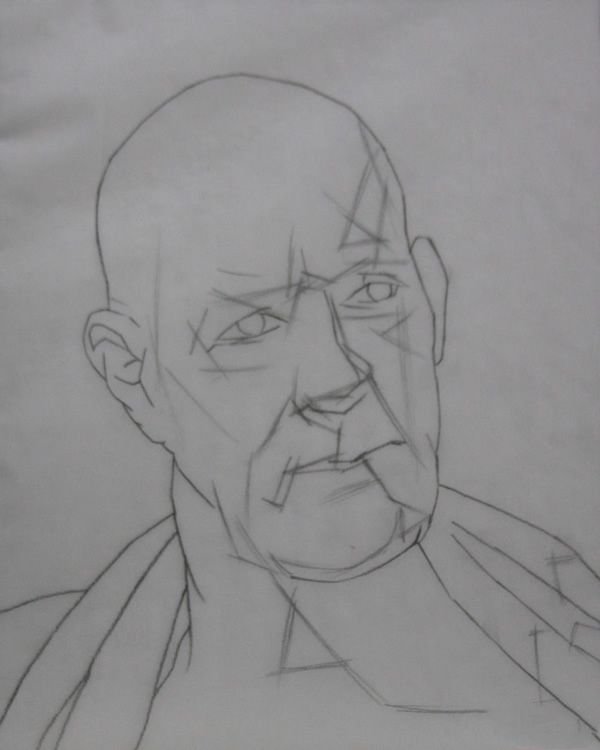
Articulated Block-In
Here above you can see that I have taken the block-in and articulated the construct to bring out the character of the sitter. I used the same approach in blocking in the shadows as I did with blocking in the head. In a general way I sketch in the shapes of the shadows later to be refined like the exterior construct. When establishing the terminator line or "bedbug line"of the shadow I try to conceive in my mind what planes shifts or underlying forms are producing certain light affects. I image how the light wraps around the forms and try to replicate that impression on my page.
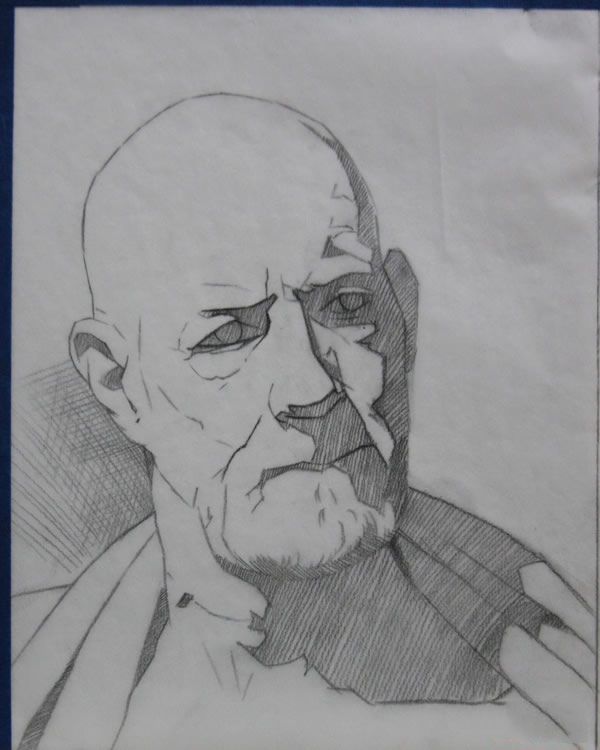
Finished Cartoon
After articulating the shadows I toned them in to compare the shapes to the whole. Once satifiy with the drawing it is ready to transfer.
The Transferred Cartoon
A couple days prior I toned some linen with raw umber and mineral spirits. I wiped it down until I could lighten it to about a value 6. Once the tone was dry I then transferred my cartoon to it.
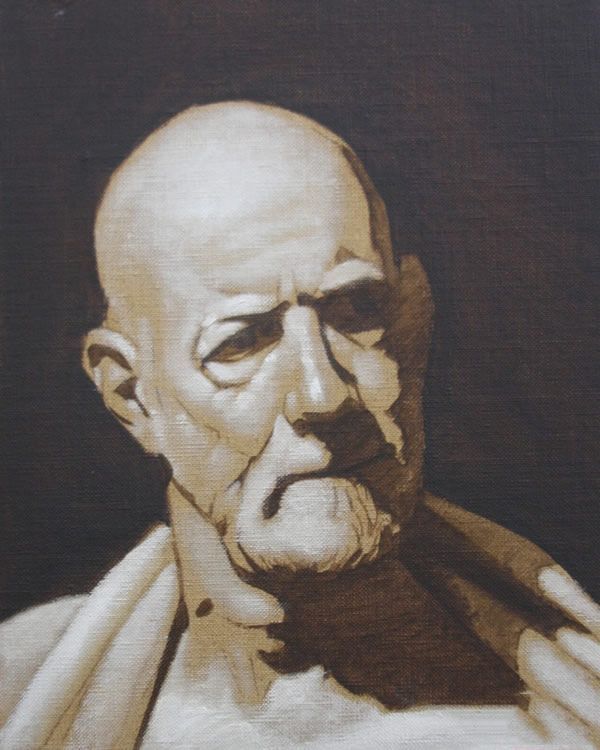
Raw Umber Wash Heightened with White
Compressing my values I washed in a semi-transparent tone for all of the shadows. In relation to the shadow tone the background was slightly darker so I mixed a value appropriate to it. With Lead White I scrubbed in the light areas keeping in mind their relationship to the forms and planes. Any value residing in the half-tones I left the pre-tone of the linen. I then leave this wash drawing to dry before I apply the color
Controlled Palette
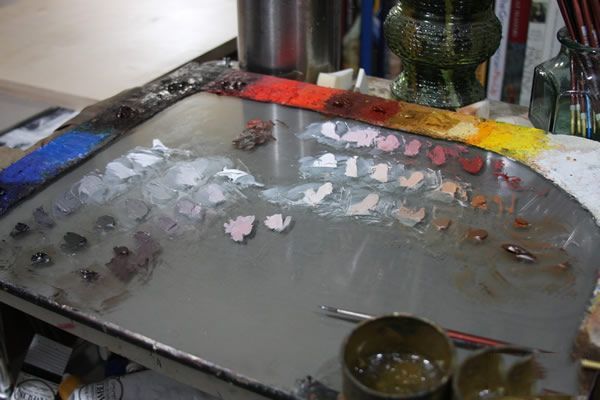
So I mixed several strings of color I believed I might find in this portrait. The strings to the left consist of Van Dyck brown and White for my neutrals. Then I have a grey/green consisting of Van Dyck Brown and Golden Ocher. To the right of that I have a grey/red made from V.D.B. and Light Red. On the opposite side is a mixture of Golden Ocher, Light Red and V.D.B. Next is only G.O and L.R. and last is a mixture of only Light Red and White. From this seemingly dull palette of mixtures I'm able to get a surprisingly beautiful natural variety of colors.
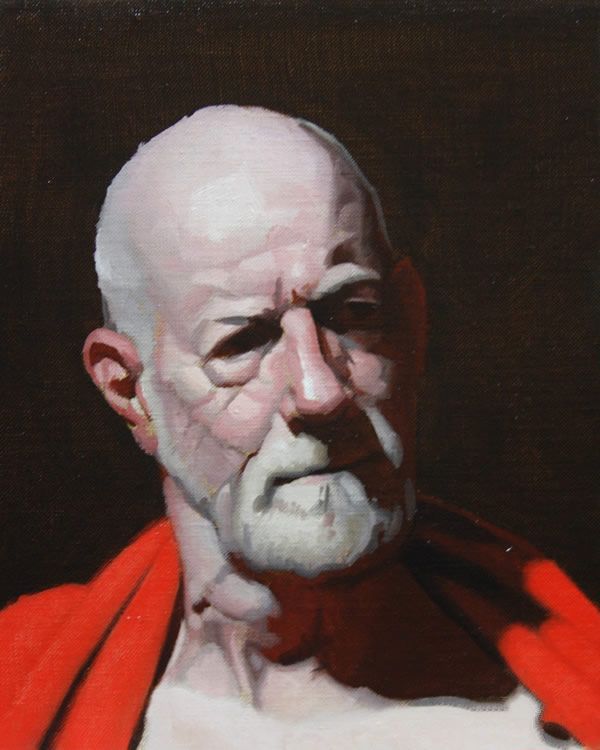
Planar / Ébauche
I approach my Ébauche Thinking about the Planes of the Head. I start with the shadow and then move to the half-tones. When I imagine shape of the planes I mix a hue with the relative value to the plane adjacent to it. At this point I'm not concerned with blending or modeling the form. If the values are correct then sense of the form turning will happen as a result.
Finished Planar / Ébauche At this time I'd like to talk a little bit about paint quality. The Ébauche is meant to be thin sketchy wash. In this Stage I dilute the paint with a mixture of 1 part linseed oil and 3 parts turpentine. I typically dip my brush in my medium cup and then wipe the excess oil off the brush. The remnant oil on the brush is usually enough to thin the paint.
My reasoning for painting this thin washy layer is to establish in a quick way all the colors and there relationships to each other. One might be saying to themselves this seems quite laborious to paint with so many stages. But for an inexperienced painter all of these stages can help the artist develop a stronger structure in which to finish there painting.
Form painting
The Form Painting Stage is when I repaint the whole head piece by piece to a finish. For some reason I almost always start with the neck. I slowly and carefully crawl over the form modeling the area section at a time. It helps a lot to have the Ébauche underneath, it allows me to think more about the modeling and less about the color. I try not to rush and move on to another part until the original section is finished. Whenever I catch myself moving ahead I take a quick break to regroup then I continue with patience. Often times when I rush I find I end up creating more work for myself later on. A lot of mindless feathering of paint doesn't amount to much but mud. So out of countless mistakes I've to be a little bit more deliberate with my paint application.


