塞拉辉煌——Lanscape绘画示范
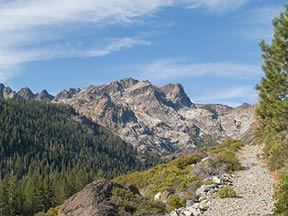
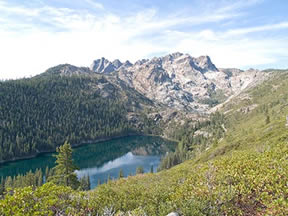
1)。在2007年的秋天,我联系了客户谁需要一个大型绘画为他们的家。他们不知道他们想要什么,但他们知道他们想要的东西占领了威严和内华达山脉的壮丽…我有很多参考照片从上涨我以前做的区域,所以使用这两个照片上面显示宏伟的山丘山脉从脊俯瞰沙丁鱼湖泊,我开始着手粉刷一个研究…
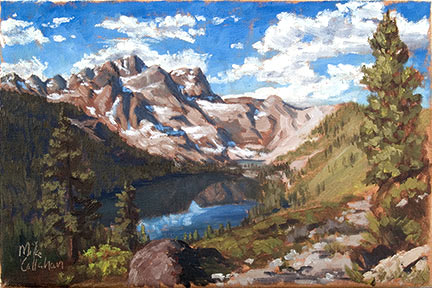
2)。与客户商议后获得一个了解他们喜欢什么、我画上面所示的研究以及另一个长湖(见1月13日在我的博客帖子)作为夫妻的提议项目。他们立即被吸引到这一个,我们同意它。我期待满怀期望当我认为这将使一个伟大的绘画…以下是它的记载。
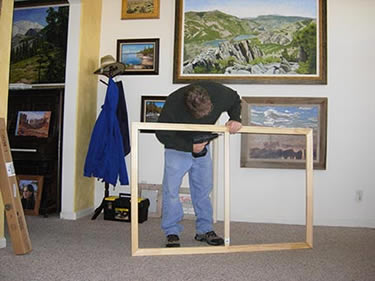
3)。这幅画将40 * 60”,大小一样“太。华盛顿“显示挂在我的工作室在我身后。
我组装了沉重的担架酒吧和安装一个中心做好伸展画布前额外的力量…
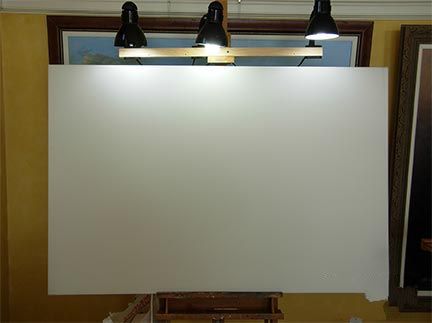
4)。用帆布拉伸尽可能的紧一个滚筒(或者至少尽可能的紧我可以伸展一个鼓),我现在已经准备好开始…
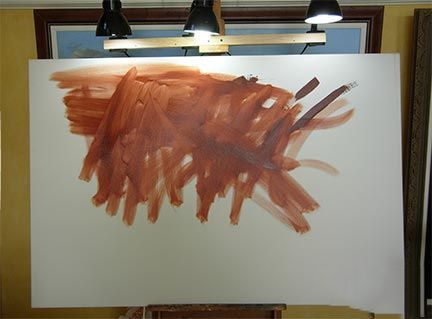
5)。这是4:45和我开始油漆混合了一个很好的鲜橙颜色,并将它应用于我的帆布大刷…这只是调我的帆布所以最终我甚至它所有的边用毛巾浸湿有点薄…

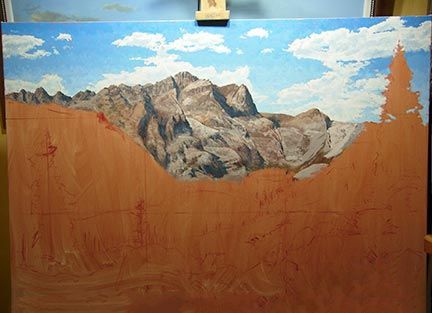
6)。一旦我的油画,我使用相同的鲜橙颜色画在我的一些主要元素…显示它旁边是我的原始的研究将帮助我当我进步。这幅画
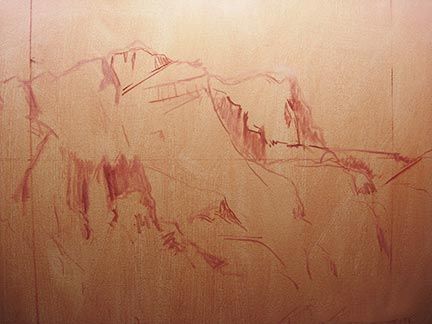
7)。在这里你可以看到详细的程度…我给自己在这个阶段没有太多…
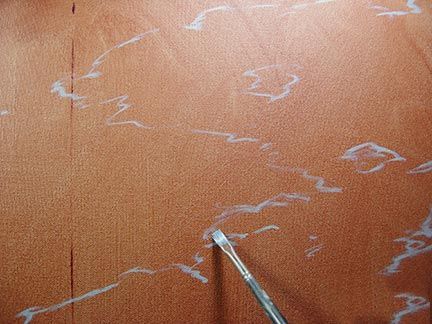
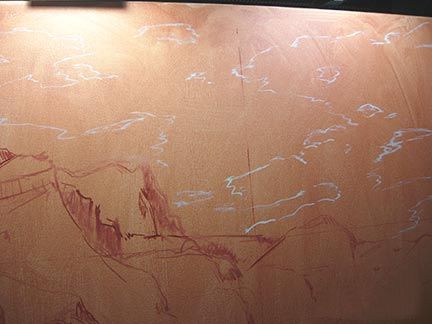
8)。我的天空是破碎和云,所以使用一个淡蓝色的颜色我定义区域的天空和云…
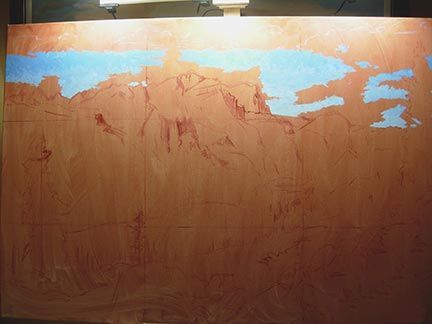
9)。一旦我已经定义了区域大约在我想要的天空和云,我就可以开始画,面积…
10)。我开始用这种轻的天空区域(一般面积接近地平线)和工作向黑暗…
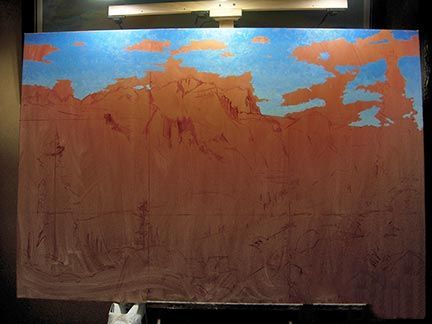
11)。我几乎完整的天空乌云开始之前…
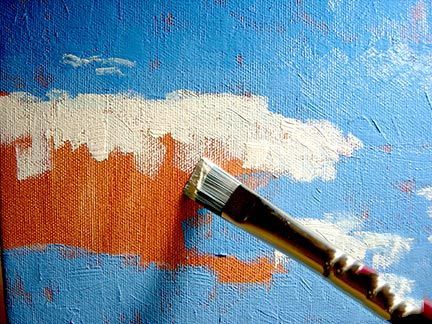
12)。我通常漆暗的曝光,但通常是天空和云是例外,尤其是云对我因为他们天性的…通常黑暗部分的云接近观众,因为它代表了阴影区域,通常有点背或顶部由太阳光点燃…
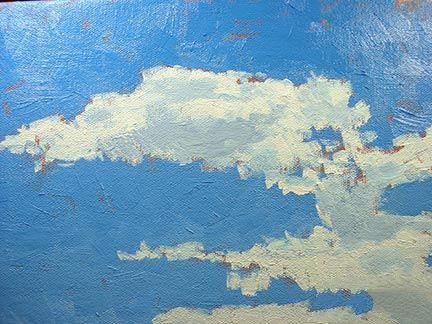
13)。完成云,我画“黑暗”地区进入光,融合不同程度取决于形状和纹理的云…
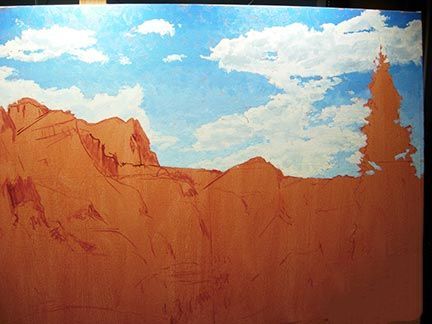
14)。这是一个视图,右边的这幅画跟天空基本完成。
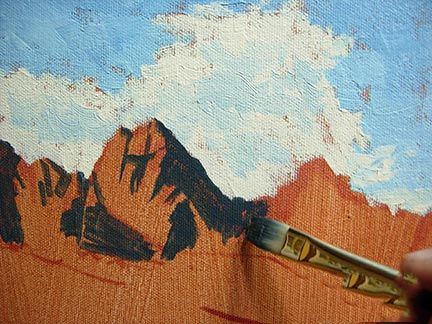
15)。一旦我满意的天空,我转移到主要的焦点,山丘的画。我开始的清淡衬垫的黑暗区域的山脉。在这张照片中,深色看上去很暗,但事实上,黑暗的地区不是超级黑。我希望这些山脉后退,因此我必须小心不去太暗的阴影在这个部分的绘画。
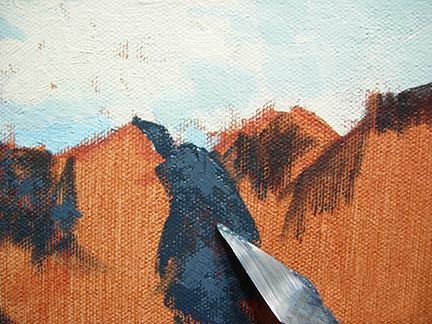
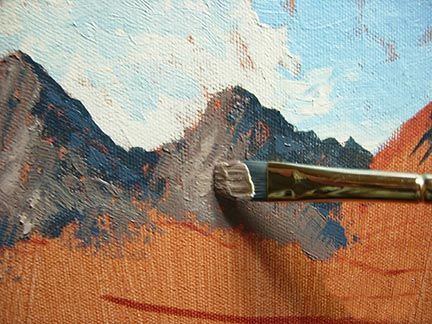
16。)我回到这些阴影区域和工作在一个小纹理与一个更轻的“黑”色才能进入光明崎岖陡峭的山丘。我轮流刀和刷在山里给他们只是数量的结构我希望。
17)。我开始油漆的明亮面山使用相同的一般方法,我起见使用基本上只有两个值…
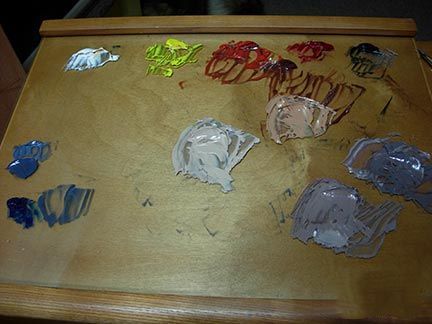
18)。我喜欢保持我的调色板非常简单的…在这个阶段的这幅画,你能看到我只有我的三个基本的原色,黄、品红和蓝色,一二次,红(主要用于混合布朗)和一个非常黑暗的颜色我称之为“blackenough”。通过组合这些和钛白我能够把一些温暖和凉爽的earthtones山上,我使用。
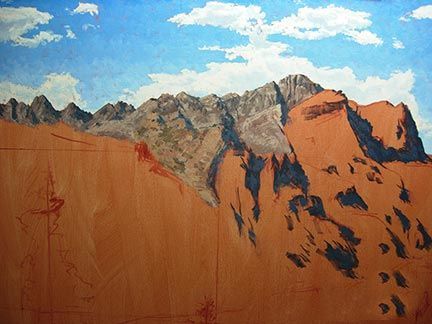
19)。所以,本质上我以这种方式procede整个山脉交替刀和刷…
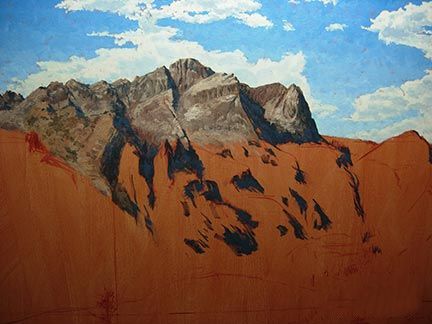
20)。显示的差异之间的进展这张照片和上面是关于一个会话的进步…画我还有很长的路要走!

21。)像这样的细节在山上可以让画家,但是想让自己从不知所措,我工作在部分关注价值观和颜色在每个区域作为他们之间的相互关系和整个…
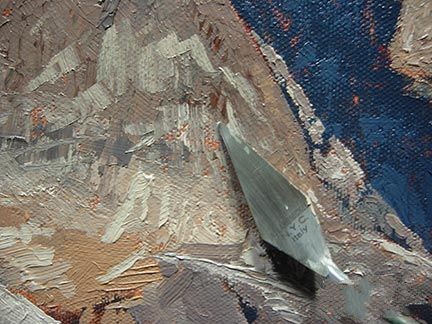
22。)这是一个“近距离”照片显示程度的刷和刀工作构成的山…
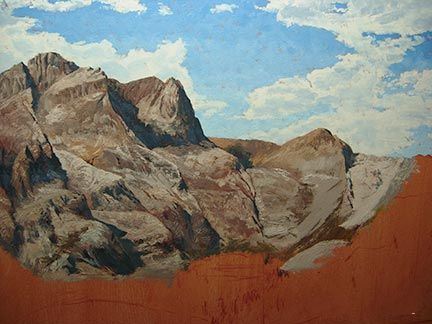
23)。和在这儿站回来有点…
24)。我几乎完成了崎岖不平的山丘和不久将在中期地面部分的画…
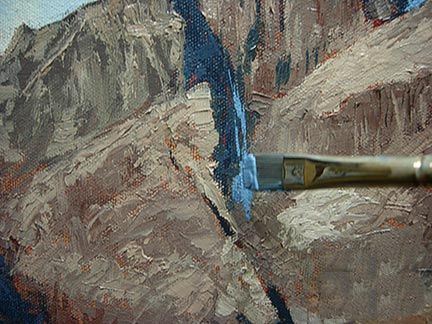
25)。完成了山,我必须油漆在一点剩余的雪,总是呆在他们一年到头…我从雪在阴影区域——尽管阴影,还很轻价值明智…
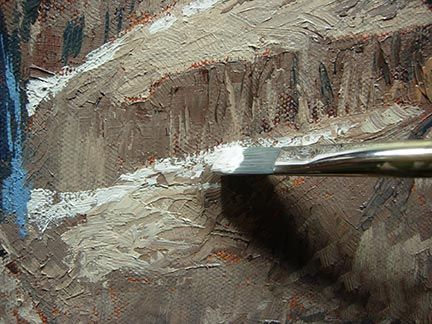
26)。和光明的部分,虽然很亮不是真的接近纯白色(尽管它看起来在这张照片)我通常涂料两云和雪以一定的黄色混合在…
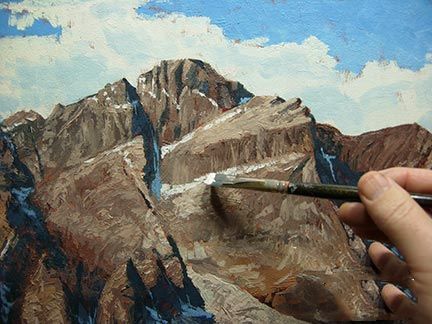
27)。啊,那雪是唯一真正给一些深度这些崎岖的山峰…
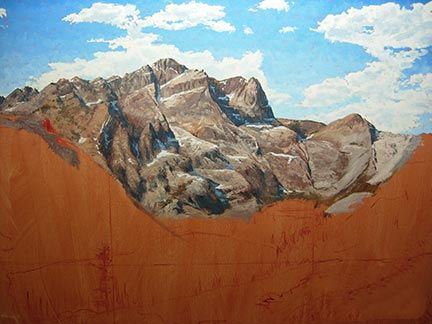
28)。这里有一个镜头的主要部分在他们完成状态附近的山丘…
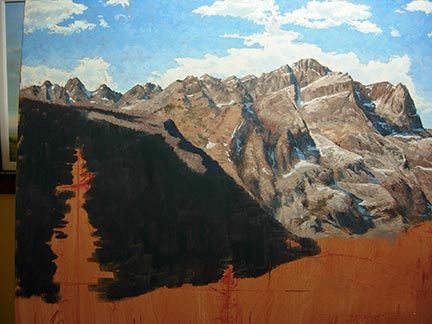
29)。这棵树覆盖的山坡的中间,几乎没有开始接收光随着太阳位置东向西穿过天空。被仍在阴影相当多,我underpaint相当黑暗的,画前任何树木覆盖它。介意你,这仍然是相当轻于黑色虽然很难说,在这张照片,没有任何东西可以比较它…
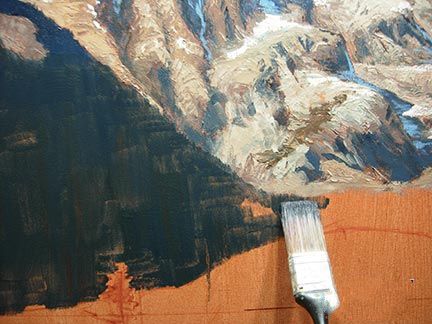
30)。这张照片显示的实际价值,暗区好一点比上面…
原文如下:
Sierra Splendor – Lanscape Painting Demonstration
1.) In the fall of 2007, I was contacted by clients who needed a large painting for their home. They weren’t sure of exactly what they wanted, but they knew they wanted something that captured the majesty and grandeur of the Sierras…I have many reference photos from hikes I’ve done in the area, so using the two photos shown above of the majestic Sierra Buttes from a ridge overlooking the Sardine lakes, I set out to paint a study…
2.) After consulting with the clients to get an understanding of what they liked, I painted the study shown above as well as another one of Long Lake (see the January 13th post on my blog) as a couple of proposals for the project. They immediately gravitated toward this one and we agreed upon it. I looked forward with great anticipation as I thought this would make a great painting…following is the chronicling of it.
3.) The painting will be 40″ x 60″, the same size as “Mt. Washington” shown hanging in my studio behind me.
I assemble the heavy stretcher bars and install a center brace for added strength before stretching the canvas…
4.) With the canvas stretched as tight as a drum (or at least as tight as I could stretch a drum), I’m now ready to begin…
5.) It’s 4:45 am and I begin to paint by mixing up a nice burnt orange color and apply it to my canvas with a large brush…this is just to tone my canvas so ultimately I’ll even it all out to the edges with a towel wetted with a little thinner…
6.) Once my canvas is toned, I use the same burnt orange color to draw in some of my major elements…shown next to it is my original study which will aid me as I progress in the painting.
7.) Here you can see the extent of the detail I give myself…not too much at this stage…
8.) My sky is broken up with clouds, so using a light blue color I define the area of clouds and sky…
9.) Once I’ve defined the areas roughly where I want the sky and clouds to be, I can begin painting that area…
10.) I start with the lighter area of the sky (generally the area nearer the horizon) and work toward the darker…
11.) I pretty much complete the sky before beginning the clouds…
12.) I usually paint dark to light, but both sky and clouds are typically exceptions for me, especially clouds because of their nature…usually the dark part of the cloud is nearer the viewer as it represents the shadow area and is often times somewhat back or top lit by the Sun…
13.) To finish the clouds, I paint the “dark” areas into the light, blending to various degrees depending on the shape and texture of the clouds…
14.) Here’s a view of the right side of the painting with the sky mostly done.
15.) Once I’m satisfied with the sky, I move on to the main focal point of the painting, the buttes. I start by thinly laying-in the dark area of the mountains. In this photo, the darks look quite dark, but in actuality, the dark areas aren’t super dark. I want these mountains to recede a bit and as such I must be careful not to go too dark in the shadows in this part of the painting.
16.) I come back into these shadow areas and work in a little texture with an even lighter “dark” color before moving on to the light side of the rugged buttes. I alternate between knife and brush in the mountains to give them just the amount of texture I want.
17.) I begin to paint the lit side of the mountains using the same general approach, I block-in using essentially only two values…
18.) I like to keep my palette very simple…at this stage of the painting you can see I only have my three basic primary colors, yellow, magenta and blue, one secondary, red (used mostly to mix the brown) and a very dark color I call “blackenough”. Through combinations of these and Titanium white I’m able to mix the few warm and cool earthtones that I use on the mountains.
19.) And so, essentially I procede in this manner across the mountains alternating between knife and brush…
20.) The difference in progress shown between this photo and the one above is about one painting session’s progress…I have a long way to go!
21.) The detail in mountains like this can be overwhelming to the painter, but to keep myself from being overwhelmed, I work in sections paying attention to the values and colors in each area as they relate to each other and the whole…
22.) Here’s an “up close” shot showing the degree of brush and knife work that make up the mountains…
23.) And here it is standing back a bit…
24.) I’m nearly done with the rugged buttes and will soon be moving on to the mid-ground part of the painting…
25.) To finish off the mountains, I have to paint in a bit of the remaining snow that usually stays on them year round…I begin with the snow in the shadow areas – though shaded, still quite light value-wise…
26.) And the light part, though quite bright isn’t really close to pure white (even though it looks so in this photo) I usually paint both clouds and snow with a fair degree of yellow mixed in…
27.) Ah, that snow is just the thing to really give some depth to these rugged peaks…
28.) Here’s a shot of the main part of the buttes in their near finished state…
29.) The tree covered mountainside in the middle ground is barely beginning to receive light as the Sun moves east to west across the sky. Being still in shadow quite a bit, I underpaint a fairly dark area before painting any of the trees that cover it. Mind you, this is still quite a bit lighter than black though it’s hard to tell that in the photo without anything to compare it to…
30.) This photo shows the actual value of that dark area a bit better than the one above…


