有一个禅宗、刷油漆层。
你必须享受过程或者这不是你…的方法。(但别担心,有很多方法来画肖像&得到类似的结果)。就我个人而言,我喜欢任何方式是很容易的。这是非常容易的,但是,唉,这不是快的,因为你只需要等待这些层干在继续之前。
“这是好段旅程有一个终点向,但它是重要的旅程,最后。”
娥苏拉·勒奎恩
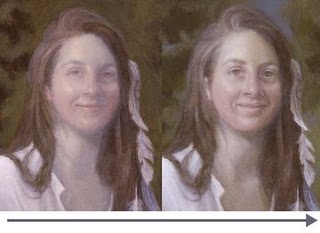
在左边的照片是最后完成层(未修正的)。
右边是当前层(未修正的)。
这短暂的旅程从左到右的主题是这个小迷你演示如何画一层在脸上。(当然,同样的过程适用于手、脚,所有皮肤显示)。
我使用这个方法(多层)来构建光和形式在为了得到小幅度的亮度大师。
层次越多我漆——发光它得到。
这个例子只是其中的许多“中间层”,只是说明了一个小(和相对容易)的一步,进入画一幅肖像。
这个特殊的脸很小,只有3.25英寸高,整个层(如图所示)这里只花费了我半个小时(或多或少)。这是更容易和更快的比它看起来,真的!
难的是等待我的油漆干所以我可以开始构建下一层。
当我等待,但是,我的工作背景、服装、道具、其他绘画,这个博客,跑腿,吃午餐…你懂的。
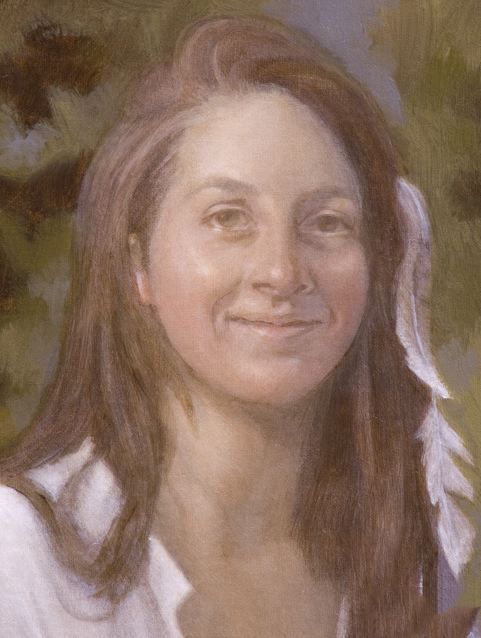
这是更正后的脸从过去演示在失去/找到相似。现在准备好另一层。

我首先加强灯光(钛白)和深色(生赭变薄与Liquin)来提高反差。我尽量避免硬边在这。
我让这彻底干燥(即。,一夜之间)。

这是我在一个层板使用。不管肤色是光或黑暗…颜色是一样的,但是显然,值会有所不同。
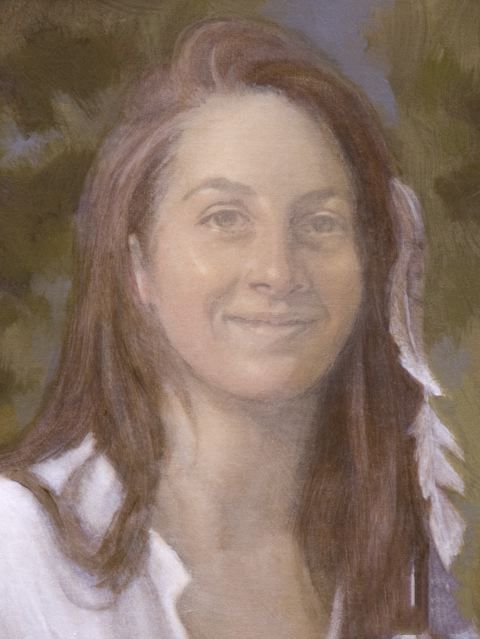
我混合/匹配近似肤色(生赭,烧棕土、黄赭、钛白色),把它和Liquin和渐淡它在整个脸。
注意,我从未如此厚重,油漆是我看不透这层下面。
明白为什么我加强了感光灯撞了&对比?
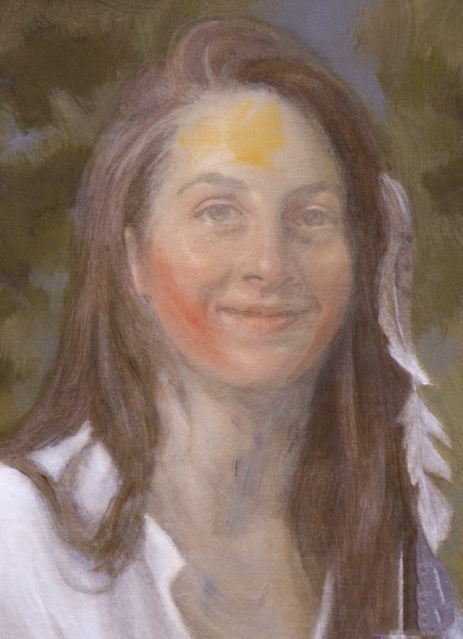
进入湿表面,我添加颜色。看到我的演示在旧主色带在肖像画详情。
我混合这些颜色在。
这就是我如何组合“万能色的光。”
我使用这个“万能色的光”来构建光表面上(或任何地方)。
如果光线看起来白垩,我添加更多的黄色。
如果光线看起来太黄,我添加更多的白色。
我继续把光分解成脸。我只是使用光——而不是颜色。
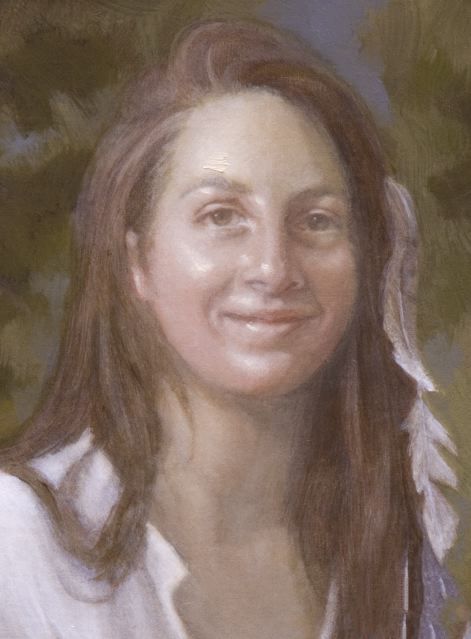
我继续添加光。我定位和加强中心的光与厚漆。
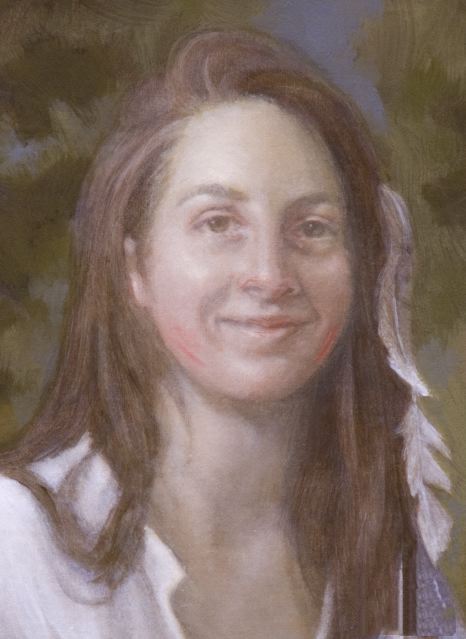
我添加更多的光,它的工作,让光建立和定义形式。
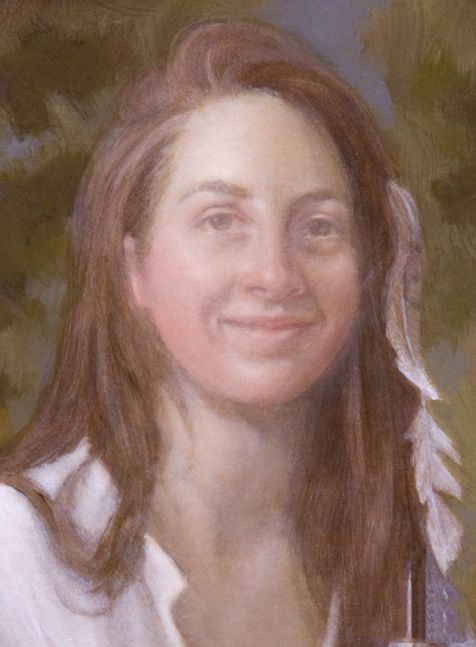
我继续定义形式与光。
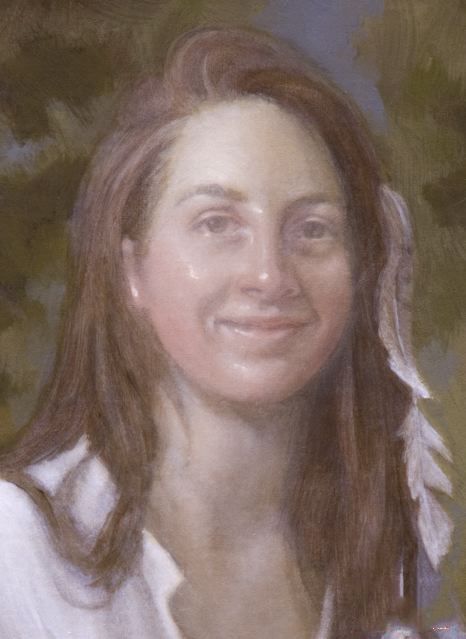
我添加更多的光线进入到中心的光(定义的亮点)。
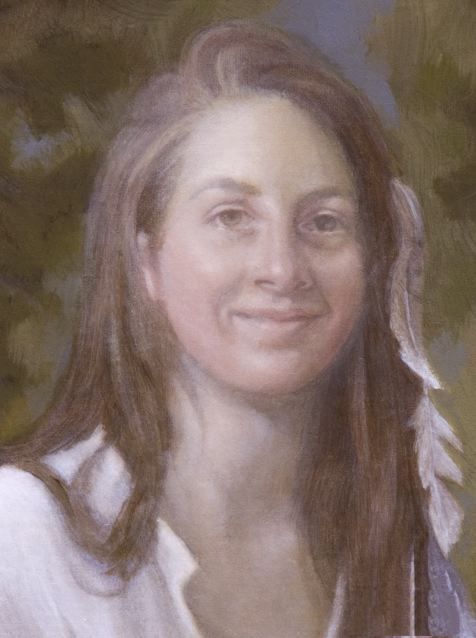
我工作这灯和构建形式。我允许光线进入的头发。
这一层是完成了,它必须被允许彻底干燥。
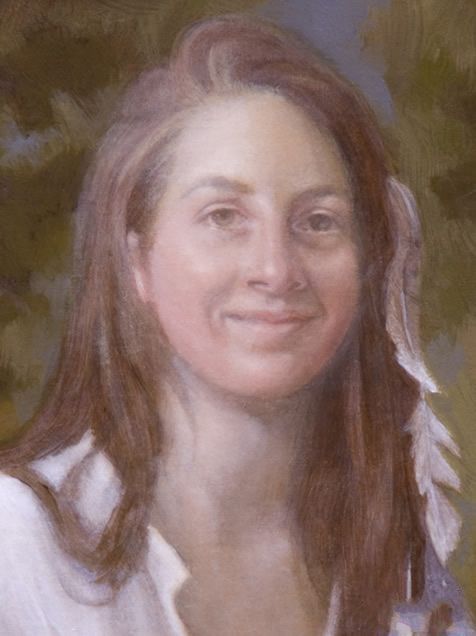
我做了正确的上面的照片,接着和画下一层下面。
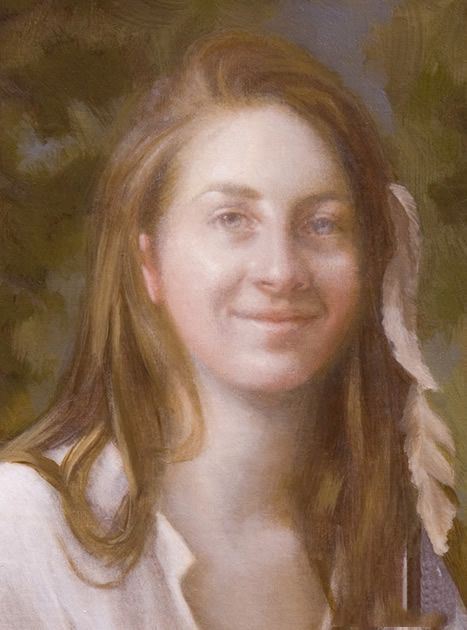
上图:这是一个偷看下一层(未修正的以相似,没有肤色釉和不明确的特性)。光现在这么厚你不能看到画布的编织通过它。我开始工作在头发上。我希望这张照片不是那么小,真是一个飞跃。
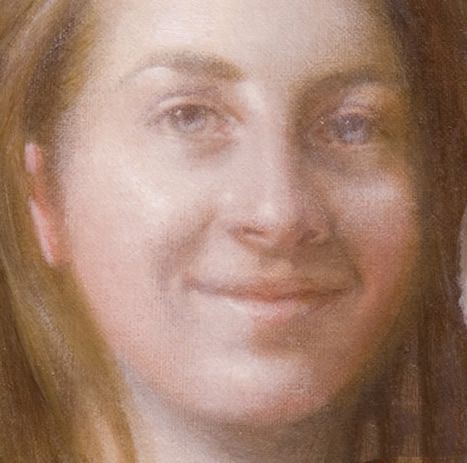
这是一个细节。你可以看到下面的颜色我构建光锁在这张脸。
下一个:
*
我将纠正相似和定义特性与生赭,让它干。
*
接下来我将釉这个回的肤色,让它干。
*
然后我将匹配一个渐淡的肤色和工作颜色(乐队)的脸上
*
我会让这干,如果有必要,重复上面的过程。
考虑到“未完成的”这个阶段看起来现在,它相对快速和容易改变一个面对几层光成一个完成的脸。
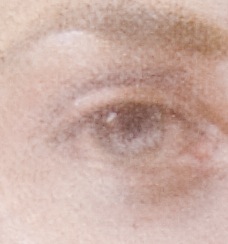
这是一个细节展示光流在面对什么是下面还被看见。不油漆,围绕特性如眼睛、眉毛——不要害怕漆在整个脸为了定义光。它是油漆,显示出一幅它通过细微的美丽形式。
注意:我通常做脸最后的肤色是真的取决于什么围绕着它(即。、背景)。所以我要停止工作表面上,把其余的现在这幅画是在我得到所有的颜色成这张脸。
我只是不断重复这个过程,直到整个分层脸告诉我是时候该停止和完成。
“一切都相同的,一切都不同。”
——禅宗谚语
原文如下:
There’s a Zen to painting in layers.
You have got to enjoy the process or this isn’t the method for you….(but don’t worry, there are lots of ways to paint a portrait & get a similar result). Personally I like any way that is easy. And this is pretty easy – but alas, it isn’t fast ’cause you just have to wait for those layers to dry before moving on.
“It is good to have an end to journey toward, but it is the journey that matters, in the end.”
-Ursula K. LeGuin
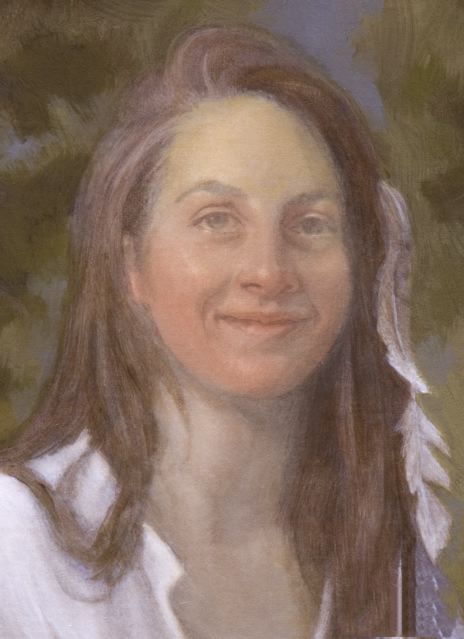
On the left side is a picture of the last completed layer (uncorrected).
On the right is the current layer (uncorrected).
That short journey from left to right is the subject of this little mini- demo on how to paint a layer on a face. (Of course, the same process works for hands, feet, all skin showing).
I use this method (multiple layers) to build light and form in small increments in order to get the luminosity of the Old Masters.
The more layers I paint – the more luminous it gets.
This example is only one of the many “middle layers” and merely illustrates a small (and relatively easy) step that goes into painting a portrait.
This particular face is small, only 3.25 inches high and this entire layer (shown) here only takes me half an hour (more or less). It is a lot easier and faster than it looks – really!
The hard part is waiting for my paint to dry so I can begin to build the next layer.
While I wait, however, I work on background, clothing, props, other paintings, this blog, run errands, eat lunch…you get the idea.
This is the corrected face from the last demo on losing/finding a likeness. It is now ready for yet another layer.
I begin by reinforcing the lights (Titanium White) and the darks (Raw Umber thinned with Liquin) to increase the contrast. I try to avoid hard edges in this.
I let this dry thoroughly (i.e., overnight).
This is the palette I use in a layer. It does not matter if the skin tone is light or dark…the colors are the same but obviously the values will be different.
I mix/match the approximate skin tone (raw umber, burnt umber, raw sienna, titanium white), mix it with Liquin and scumble it over the entire face.
Note that my paint is never so thick that I cannot see through it to the layer below.
See why I reinforced the darks & lights to bump up the contrast?
Into the wet surface, I add color. See my demo on Old Master Color Banding in Portraiture for particulars.
I blend those colors in.
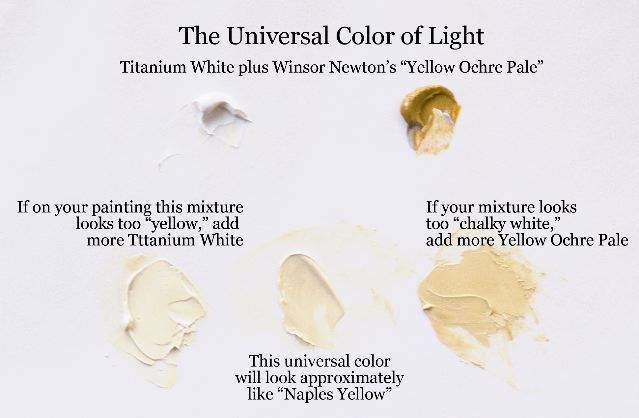
This is how I mix “The Universal Color of Light.”
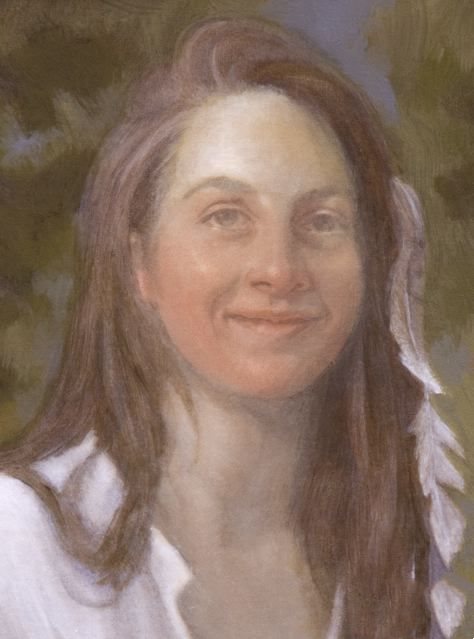
I use this “Universal Color of Light” to build light on the face (or just about anywhere).
If the light looks chalky, I add more yellow.
If the light looks too yellow, I add more white.
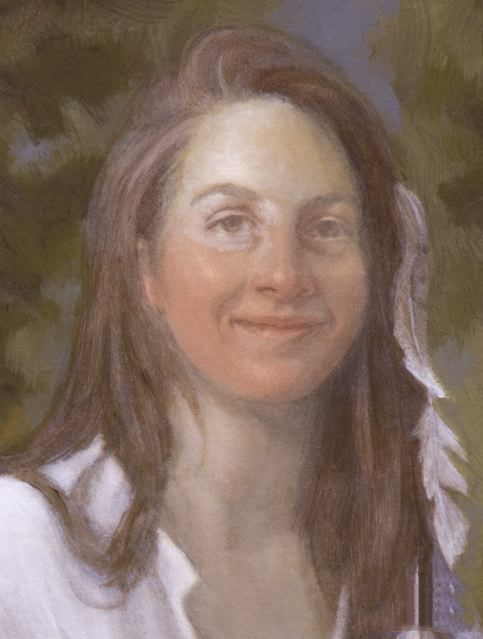
I continue pulling the light down into the face. I am only working with light – not color.
I continue adding light. I locate and reinforce the centers of light with thicker paint.
I add more light, work it in and let the light build and define the form.
I continue to define the form with light.
I add even more light into the centers of light (as defined by the highlights).
I work this light in and build form. I allow the light to go into the hair.
This layer is done and it must be allowed to dry thoroughly.
I did correct the above pix, then went on and painted the next layer below.
ABOVE: Here is a peek at the next layer (uncorrected as to likeness, without a skin tone glaze and ill-defined features). The light is now so thick you cannot see the weave of the canvas through it. I’ve started to work on the hair. I wish this photo wasn’t so small – it is really quite a jump forward.
This is a detail. You can see the color locked underneath as I build light on this face.
Next:
*
I’ll correct the likeness and define the features with raw umber and let it dry.
*
Next I’ll glaze this back into a skin tone and let it dry.
*
Then I’ll match a scumble to the skin tone and work color (bands) into the face
*
I’ll let this dry – and repeat the process if necessary.
Considering how “unfinished” this stage looks right now, it is relatively quick and easy to transform a face with several layers of light into a finished face.
This is a detail showing how the light flows over the face with what is underneath still being visible. Do NOT paint around features like eyes, eyebrows – and don’t be afraid to paint over the entire face in order to define the light. It is the paint that shows through that gives a painting its subtle beauty of form.
NOTE: I usually do the face LAST as the skin tones are really determined by what surrounds it (i.e., the background). So I’m going to stop working on the face now and bring the rest of this painting into being before I get all the color into this face.
I just keep repeating this entire layering process until the face tells me when it is time to stop and finish.
“Everything the same; everything distinct.”
- Zen Proverb


