Far Below - Step by Step Angel Demo
This warm painting has a nice glow to it and the final finish is very close to what I was trying to achieve. For this genre of inventive paintings, I spend more time designing than actually painting, trying for a dramatic composition and overall mood that says something emotional. Eventually, I may move toward more of a strict design, even an outlined graphic approach, which I love seeing with transparent color. But for now, I enjoy doing realistic tonal images where the realism helps bring across the mood and convey a sense of believeable possibilities.

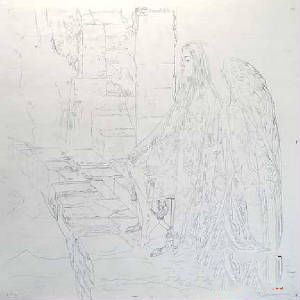
Drawing projected onto canvas
This piece was drawn out onto canvas, then fixed and then mounted onto board. Its 48" square and a good size for me to work the figure on. I always figure the size according to how big I want the important figure's face to be painted. In this case areound 5 " high. If I could, and had the time, I would do nearly every painting at least this large if not mural size. The main reason is that my paint application works better for me with larger, thicker strokes rather than using smaller brushes that don;t hold nearly enough paint or have the drawing power to cover an area efficently.
Usually I have a comp or color rough just to the side of my painting that I can quickly refer to. I make up a lot on each painting, even when I have good reference, but it helps to have a comp to look at- similar to taking notes for writing a book. On this piece, my main reference for the background was a 20 year old black and white photocopy from a garden book, circa 1920. I like old pinhole camera shots, and while I very rarely refer to outside reference, I sometimes come across an exciting image that I set aside until I find some way to incorporate it.

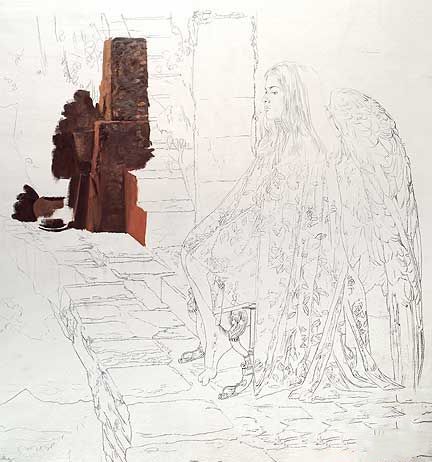
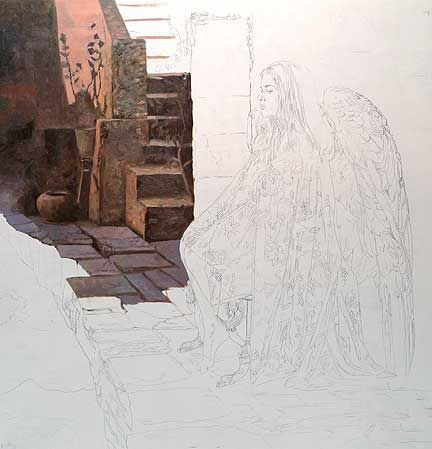
Painting started, upper left corner to lower right
My goal is to put a layer of wet oil directly over the entire painting that I can go back into and work the edges. This allows me to easily throw relative planes in and out of focus, if the paint remains wet and I can cover the image area quickly. Before I began to paint, I added a few drops of oil of cloves to those colors that dry much more quickly, and enough linseed oil to make a large pile of paint buttery and smooth, well mixed with a palette knife.
Once the entire surface is covered I let this dry for 2 to 3 weeks! This allows enough time for the painting to accept a faster drying overcoat that I use to finess the edges and retain the luster of a finished surface. If I painted over the slower drying underlayer with a faster drying layer too soon the top layer might dry faster and literally pull the lower layer until eventual cracking and separations form. If you study drying techniques and oil mediums you can see how the earlier artists worked, their approach and intent as far as their technique goes.


