

维珍河在锡安国家公园——水彩画技术由罗兰·李
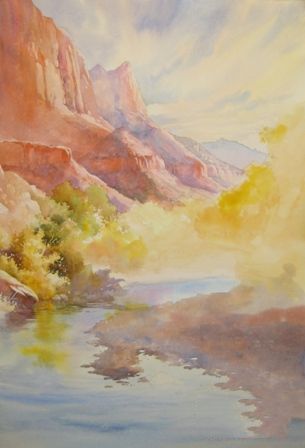
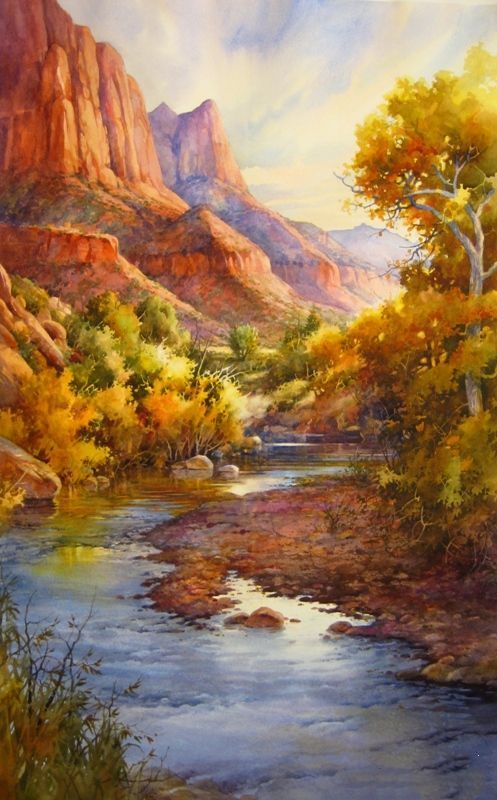
你知道我花了很多时间在锡安国家公园。秋天可能只是我最喜欢的时间挂了。西部,秋天是晚于其他地区的。你仍然可以看到这样的场景在锡安峡谷清晰到11月下旬,当树叶终于把布朗和下降。在那之前,虽然,亮黄和金叶子的杨木树创建一个光荣的背景为蜿蜒曲折的维珍河看起来太和平有雕刻的这个地方。俯瞰这个场景大守望山在左边。
因为在这个景观的威严,我决定把它漆成非常大的。我用一张26 x 40拱门冷压纸。这是艰难的工作,因为它的困难这个大跨越水面而纸是平的。然而,由于液体性质的水彩很难漆垂直放在画架上没有一切运行出底部。所以我结合使用的方法取决于哪一部分的画我正在努力。
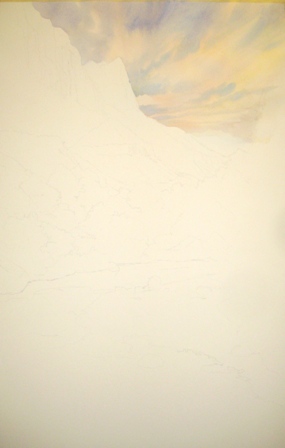
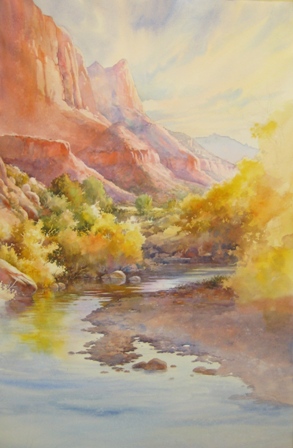
1。我开始画这幅画的天空使用湿在湿技术。你可以比较这一步与油漆完右边当你遵循一步一步的绘画过程。
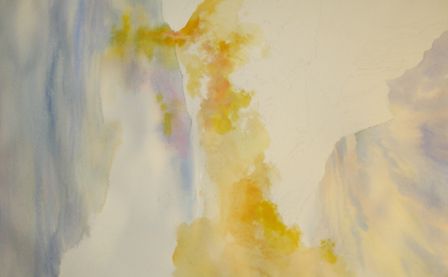
2。虽然天空干我躺在河边的基本形式使用相同的湿在湿法。我使用一个1英寸的一侧水彩画刷“渐淡”的黄色的树叶,试图创建一个钻头的结构如我去。

3。很快我开始注意形状元素从广泛的松散的工作通道轻颜料暗值作为绘画的进展。很难告诉在这里,因为一切都是那么轻,但我保留一些灯在非常特殊的地区。
4。现在事情开始成形作为我模型的峭壁和地方我的一些感光树叶。从现在开始我将申请先后暗釉来创建一个富有价值的对比。
5。注意我是如何使用负画树叶形状的中间,和一些岩石的前景。现在我来回变化,从距离前景。
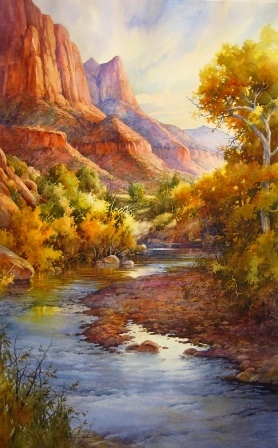
6。随着绘画接近完成,我完成前台岩石的细节,灌木丛中左下方的和添加的真实感,水波纹和电流指示。你能确定绘画之间的差异在这个阶段和油漆完下个吗?
完成的画。你怎么喜欢它吗?
“维珍美在锡安”
由罗兰·李
介质:透明的水彩
图片:24“×39”
框架:34 * 49”
原文如下:
As you know I spend a lot of time in Zion National Park. Fall might just be my favorite time to hang out there. Out west, autumn comes later than other parts of the country. You can still see scenes like this one in Zion Canyon clear into late November, when the leaves finally turn brown and drop. Until then, though, brilliant yellow and gold leaves of Cottonwood trees create a glorious backdrop for the meandering Virgin River which looks too peaceful to have carved this place. Overlooking the scene is the big Watchman mountain on the left.
Because of the majesty in this landscape, I decided to paint it very large. I am using a sheet of 26 x 40 Arches cold press paper. It's tough to work this large because its difficult to reach across the surface while the paper is flat. However, because of the liquid nature of watercolor it is hard to paint vertically on an easel without everything running off the bottom. So I use a combination of methods depending on which part of the painting I'm working on.
Learn more about this painting
See over 40 more watercolor painting demonstrations by Roland Lee
1. I begin this painting by painting the sky using a wet-in-wet technique. You can compare this step with the finished painting at right as you follow the step by step painting process.
2. While the sky dries I lay in the basic form of the river using the same wet-in-wet method. I use the side of a 1-inch aquarelle brush to "scumble" in the yellow foliage, trying to create a bit of texture as I go.
3. Notice how quickly I start to shape the elements working from broad loose passages of lighter pigments to darker values as the painting progresses. It is hard to tell here because everything is so light, but I am preserving some lights in very special areas.
4. Now things start to take shape as I model the cliffs and place some of my darks in the foliage. From here on out I will be applying successively darker glazes to create a rich contrast of values.
5. Notice how I use negative painting to shape the foliage in the middle ground and a few of the rocks in the foreground. Now I move back and forth from distance to foreground.
6. As the painting nears completion, I finish up the foreground rock details, the bushes on the lower left and add realism to the water by indicating ripples and current. Can you identify the differences between the painting at this stage and the finished painting nex to it?
The finished painting. How do you like it?
"Virgin Beauty in Zion"
by Roland Lee
Medium: Transparent Watercolor
Image: 24" x 39"
Frame: 34" x 49"


