水彩分层示范:侧面肖像的苏菲

图纸
这是我画的水彩画纸,我做我的原图在新闻纸然后转移在水彩画纸。我做了一个等高线图但也试图马克地方颜色被改变。黄色层
这是我的黄色层,有两种类型的黄色。黄色赭石将工作更好的为肤色这里然后镉黄的背景。
红层
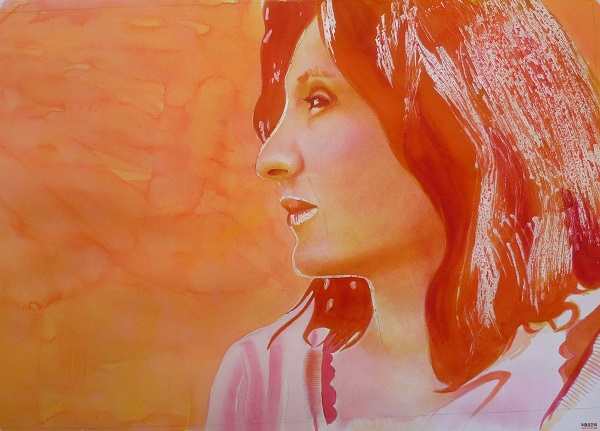
这是我的红层。与黄色我使用两种类型的红,他指的是我的照片,看到红军似乎更橙色或更多的粉红色。
添加蓝色水彩完成分层的绘画手法
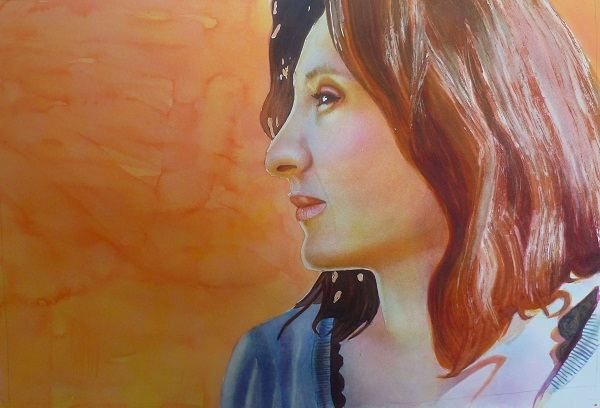
蓝色层,我试图去很轻,因为它很快就会变成太多。我也两个蓝色,一个冷却器普鲁士蓝和一个温暖的深蓝色。我使用了深蓝色的地区在树荫下和普鲁士蓝接近突出显示的区域。
整理和背景
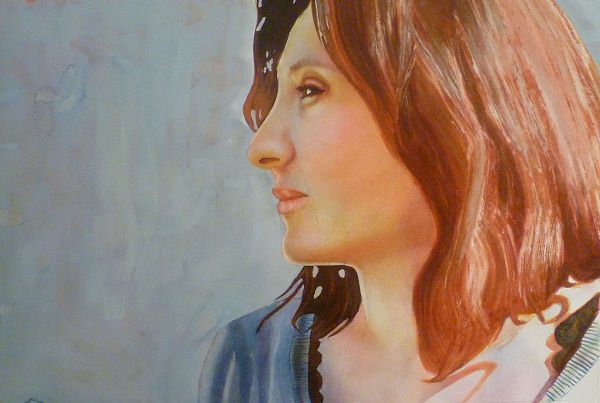
这是完成的画,我做了一些修正,添加了一个水粉画背景。原文如下:
Step by Step watercolor layering Demonstration : Profile Portrait of Sophie
Drawing
This is my drawing on the watercolor paper, I did my original drawing on newsprint and then transferred it on the watercolor paper.I did a contour drawing but also tried to mark places where color was changing.
Yellow layers
This is my yellow layer, with two types of yellows. Yellow ochre will work better for the skin tones here and then Cadmium yellow in the background.
Red Layers
This is my red layer. As with the yellows I am using two types of red, referring to my picture to see where the reds seem more orange or more pink.
Adding blue watercolor to complete the layering painting technique
With the blue layer, I tried to go very light as it can quickly become too much. I have also two blues, a cooler prussian blue and a warmer ultramarine. I used the ultramarine for the areas in the shade and the prussian blue closer to the highlighted areas.
Finishing and Background
This is the finished painting, I made some corrections and added a gouache background.


