这幅画我使用引用是一个我了一个美丽的晴天在白色的毯子覆盖了我们的世界,使它变成一个冬季仙境。尽管它还冷,太阳有足够的力量开始融化的雪在树枝上的云杉树。当水树枝掉了下来,它冻结成固体冰柱,在阳光下熠熠生辉;然后太阳把光线颜色的彩虹,当你看起来直接进入太阳穿过冰柱。我真的希望你能喜欢这节课。它真的是一个比风景静物。我想做些不正常的教训。你可以改变位置的任何东西如果你想让它更你自己的。对于那些尝试它,我喜欢看到成品,所以如果你不介意,我将会很感激你的成品图片。
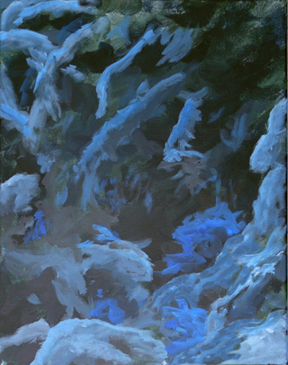
首先,我们将阻止在形状的背景将像树枝的云杉雪他们。蓝色与白色混合温莎钛在不同暗色调。不让他们因为我们希望冰柱明亮发光,而不是背景。用1”混合这些颜色的刷,块一般形状,相当线性像雪的目光聚集在树枝上。然后做同样的事情与佩恩的灰色混合与钛白在不同音调。媒介应该最小,音调一个光层氧化铬绿在几个地方给人一种错觉下分支几乎显示。保持沉默,没有真正的形状和颜色没有光线,没有在这整个层应该流行在你。请记住,冰柱是焦点。他们必须比背景更加明亮。
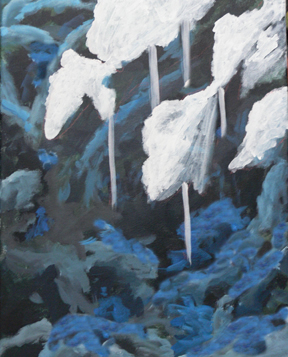
块在雪的形状与钛白前台分支。保持头脑中构成。白色太多会影响;我们希望这雪和冰柱,闪耀在顶部的背景。想想,冰柱将挂起,多长时间。油漆他们。保持数量的冰柱在奇数。阻止他们。 
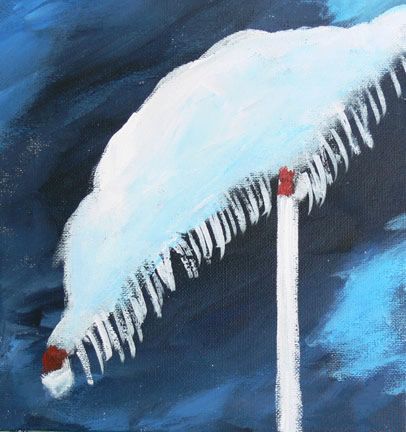
改变一个衬套刷到斯托克城在芽枝末与深褐色混合与镉红。同时,与衬套刷,中风在针头从树枝上挂下到黑暗的背景区域与钛白色。这将给你一个地方画你的绿针。这将是无用的,只是他们在绿色因为中风颜色会淹没于黑暗的背景。许多颜色是透明或半透明的表面必须准备接受另一个色彩,否则它将没有影响。 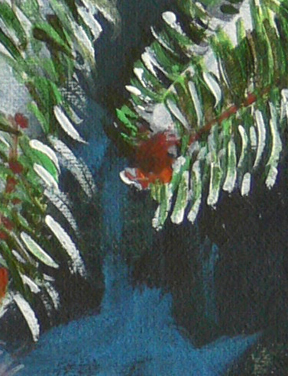
使用三种色调的绿色(绿色颜料,胡克的绿色和氧化铬绿)和一个衬套刷把在针的分支。对于黑暗的绿色、混合胡克绿色与镉红在少量。这将使一个更深色的绿色。中风的针不同的颜色。保持一个颜色会无聊,有时也会改变方向,因为自然并不总是使他们走在同一个方向。别忘了中风在大多数但并非所有的白色针挂在树枝到黑暗的背景。会有白色的突出的针,因为那里的太阳将触及和反映。中风在针的领域的白雪。你已经准备好这些因为背景的白色会欣然的接受绿色的颜色很好. . 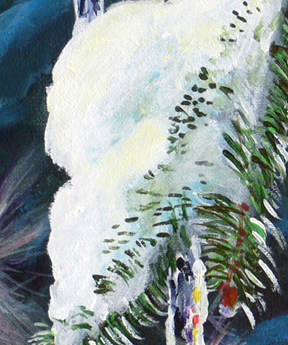
和一个小圆刷,很轻的地方少量的镉黄混合与钛白在地方的雪给一个闪耀的雪好像太阳表面反弹。在这个地区靠近针,添加少量的氧化铬绿夹杂着白色。绿色的模拟了绿色的树枝在雪作为显示通过。虽然雪刚刚下降,炎热的太阳融化,并且将它冰冷的小球在地区靠近树枝。这冰将反映在它下面是什么,即绿色的树枝。 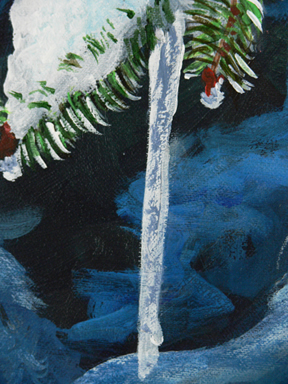

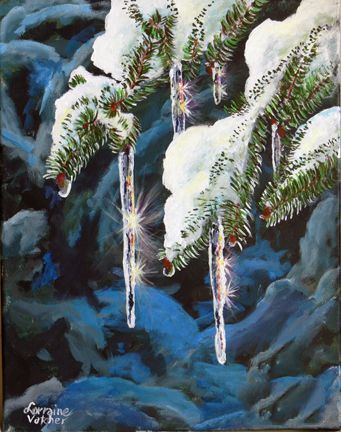
大自然的装饰品16×20丙烯酸在V
原文如下:
The picture I am using for a reference was one I took on a beautiful sunny day after a white blanket had covered our world and made it into a Winter Wonderland. Even though it was still cold, the sun had enough strength to start melting the snow on the branches of the spruce trees. As the water fell off the twigs, it froze into solid icicles which glinted in the sun; then the sun split the light into colours of the rainbow when you looked directly into the sun through the icicles. I truly hope you enjoy this lesson. It really is more of a still life than scenery. I wanted to do something which isn’t a normal lesson. You can change placement of anything if you wish to make it more your own. For those who attempt it, I would enjoy seeing the finished product so if you don’t mind, I would really appreciate an image of your finished product.
First, we will block in shapes of the background which will resemble branches of a spruce tree with snow on them. Mix Windsor Blue with Titanium White in varying dark tones. Do not make them bright because we want the icicle to shine, not the background.With a 1” blending brush, block in these colours in general shapes, fairly linear to resemble the look of snow gathered on branches.Then do the same with Payne’s Grey mixed with Titanium White in varying tones. The medium tones should be minimal. A light coat of Chrome Oxide Green in a few places gives the illusion of the under branches barely showing. Keep it muted with no real shapes and no light colours; nothing in this entire layer should pop out at you. Remember that the icicles are the focal point.They have to be much brighter than the background.
Block in the shapes of the snow on the foreground branches with Titanium White. Keep composition in mind. Too much white will detract; we want this snow and the icicle to sparkle over the top of the background. Think about where the icicles will hang and how long. Paint them in. Keep the amount of icicles in odd numbers. Block them in.
Use Windsor Blue mixed with white to give shadows in the snow on the branches. In the darkest areas, add just a hint of Payne’s Grey mixed in with the blue. Tops of the snow are always pure white with the bright sun shining on them.
Change to a liner brush to stoke in the buds at the end of the twigs with Burnt Sienna mixed with Cadmium red. Also, with the liner brush, stroke in the needles from the branches which hang down into the dark background area with titanium white. This will give you a place to paint your green needles. It would be of no use to just stroke them in greens because the colour would be drowned out by the dark background.Many colours are transparent or semi-transparent so the surface has to be prepared to accept another colour, otherwise it will have no impact.
Use three shades of green (Sap Green, Hooker’s Green and Chrome Oxide Green) and a liner brush to put in the needles of the branches. For the darkest green, mix Hooker’s Green with Cadmium Red in small amounts. This will make a much darker green. Stroke the needles in different colors. Keeping them the one colour would be boring, also sometimes vary the direction because Nature does not always make them go in the same direction. Don’t forget to stroke over most but not all of the white needles hanging off the twigs into the dark background. There will be white highlight in some of the needles because that is where the sun will be hitting and reflecting. Stroke in the needles which are on the areas of white snow. You have already prepared for these because the background of white will readily accept the green colours and show very well..
With a small round brush, very lightly place a small amount of Cadmium yellow mixed with Titanium White in places on the snow to give a sparkle to the snow as if the sun is bouncing off the surface. In the areas close to the needles, add a small amount of Chrome Oxide Green mixed with white. The green simulates the green from the twigs under the snow as showing through. Although the snow is newly fallen, the hot sun is melting it and turning it to icy pellets in areas close to the twigs. This ice will reflect what is underneath it, namely the green of the twigs.
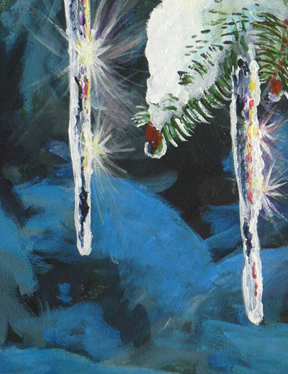
Ensure that your icicles are pure white before you start to colour them in. Then with a small round brush, brush Payne’s Grey in areas down the length of the icicle. Do the same thing again with a mixture of Payne’s Grey mixed with Titanium White. And repeat it in small spots with Windsor Blue with Titanium White. The outside edges down the length should be bright white. Next, very sparingly, spot Cadmium Yellow, Cadmium Red and Diazinon Purple. These colours will give the same idea as when a light hits a piece of glass or crystal; the light splits into differing colours. A very little bit of paint will convey the idea.
The sparkles are created in two stages. The first is with a wash of Titanium White. The washes should be with very little colour and a number 4 round brush. A number of washes is much better than one solid. Start in the center of the sparkle and pull the brush out to a point. Next, use Cadmium Red, Cadmium Yellow and Diazinon Purple in the same way, although sparingly. After the washes, hit very lightly with a hint of pure colour.The small red buds which are hanging at the end of the twigs now get a bit of water hanging from them. Use a liner brush with a little Titanium white to outline the drop. Then fill it in with Payne’s Grey and just touch them with a colour in the background which is around them. Water reflects its surroundings.With a liner brush dot the snow in lines where the needles will be peeking out of the snow. In real life, as the snow melts, more will be visible.
Nature’s Decorations 16×20 Acrylic on CanvasBy Lorraine Vatcher
This tutorial is copyright Lorraine Vatcher.


