国外画家教程:丙烯画向日葵花教程


画一个日草与丙烯酸洗
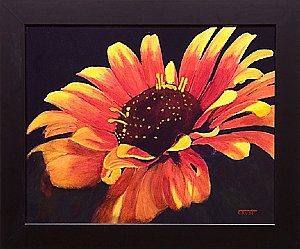
这是一个丙烯酸绘画示范我创建的日草好从一个照片我拍摄了在科罗拉多州立大学植物的试验场地2008年。这个演示的目的是说明亚克力,具有良好的颜料含量,可以创建可爱的水洗艺术家,几乎达到类似与水彩画。该示例使用一个&滑水板,和斯蒂芬奎勒丙烯酸树脂。
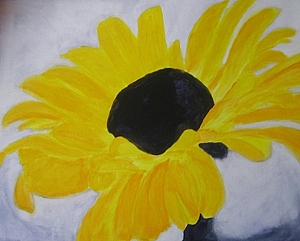
我把我的头两层斯蒂芬奎勒丙烯酸…使用Cad黄色。做了一个很轻的Cad橙色的洗材质,创建了一个光的中性灰色黄色和斯蒂芬的奎勒紫覆盖充满活力的白色的董事会的背景。我把相同的颜色暗的花中心和阀杆。整个步骤更给我一个蓝图,在哪里我要去和一个指导的颜色的地毯衬的色调。
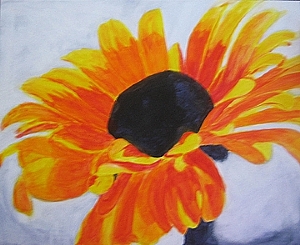
这第二步:洗涤使用相同颜色的花朵和之前一样,但我提高了热一点与五胞胎红。这和我创建混合从集团随后用于开始创建花瓣定义。
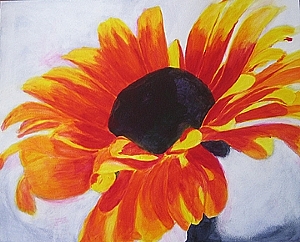
接下来我说我第一次洗的洋红。我将回来后,点亮我更当我做详细的工作。再次,花更多的时间定义的花瓣和阴影。
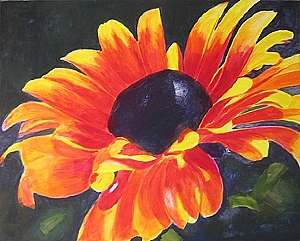
我开始之前最后的细节工作,我想把我的背景开始获得一个整体的感觉,这幅画。所有颜色的背景值创建使用花瓣和他们的complimentaries,打算创建不同程度的中性色,加重已经充满活力的绘画。我很高兴它是如何寻找。
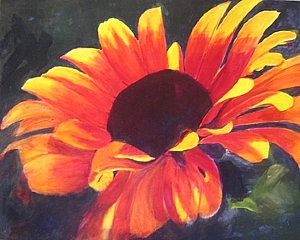
在这个图像中,我花了更多的时间描述的花瓣,花瓣形状添加阴影,纠正,并开始软化边缘和玩背景颜色多一点。我仍然保持有限的调色板我开始。
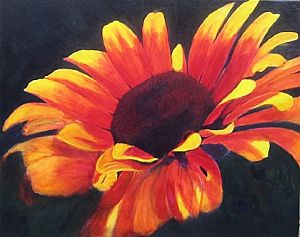
这基本上是最后一步之前添加雄蕊。我拿出一些不必要的小花瓣。重塑一个少数看起来更好。黑暗的我的背景为充满活力的颜色没有出现多达我曾希望与柔和的背景。虽然我讨厌牺牲,只是不允许辉光我正在寻找。我还添加了最后一点洋红和奎勒紫罗兰的花瓣。
原文如下:
Painting A Zinnia With Acrylic Washes
ZOWIE by Cyd Rust Copyright 2009
This is an acrylic painting demonstration of a Zowie Zinnia I created from a photograph I captured at the Colorado State University Floral Testing Site in 2008. The purpose of this demo is to show how Acylics, with good pigment content, can create lovely washes for the artist, almost similar to those achieved with watercolors. This demo uses an Ampersand Aquaboard, and Stephen Quiller Acrylics.
Step 1: The Initial Washes
I applied my first two coats of Stephen Quiller Acrylics…using Cad Yellow. Did a very light wash of Cad Orange for shading, and created a light neutral gray with the yellow and Stephen’s own Quiller Violet to overlay the vibrant white of the board’s background. I took the same color darker for the flower center and stem. This entire step is more to give me a blueprint as it were, of where I want to be going, and a guidance of color with an underlayment of hues.
Step 2: The Intermediary Washes
This second round of washes used the same colors on the flowers as before, but I upped the heat a little with Quin Red. That and the mixes I created from the group were then used to begin creating petal definition.
Step 3: The Final Washes Before Beginning Details
Next I added my first wash of Magenta. I will come back in later and brighten it up even more when I do the detail work. Again, more time spent defining of the flower petals and shadows.
Step 4: Beginning The Background
Before I begin the final detail work, I wanted to begin placing my background to get an overall feel for the painting. All colors in the background are values created using the flower petals and their complimentaries, with the intention of creating varying degrees of neutrals to amplify the already vibrant painting. I am quite pleased at how it is looking.
Step 5: Softening and Defining
In this image I have spent a little more time delineating petals, adding shadows, correcting petal shapes, and beginning to soften edges and play with the background colors a little more. I am still keeping to the limited color palette I started with.
Step 6: Clean Up
This was basically the final step before adding the Stamens. I took out a few unnecessary small petals. Reshaped a few to look nicer. Darkened my background as the vibrant colors just weren’t popping as much as I had wanted with the softer background. While I did hate sacrificing that, it just wasn’t allowing the glow I was looking for. I also added the final bit of Magenta and Quiller Violet to the petals.
标签:
