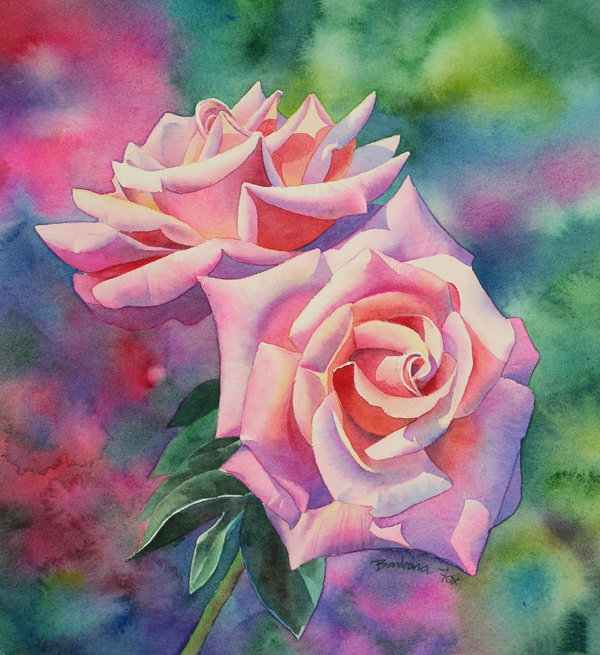
水彩画示范由芭芭拉福克斯——“梦幻般的粉红色”

梦幻般的粉红色水彩9 x 10”
梦幻般的粉红色绘画示范
油漆用于此水彩画:温莎牛顿和m·格雷厄姆,幅霍尔拜因特别注明。
- 镉柠檬
- 新藤黄
- 暗绿色
- 妓女绿色
- 孔雀蓝色(幅霍尔拜因)
- 钴蓝色
- 普鲁士蓝
- Dioxazine紫色
- 永久玫瑰
- 歌剧(幅霍尔拜因)
- 二氢喹吖啶红
- 二氢喹吖啶紫
- 暗红
纸我使用是杰克Richeson 300磅冷压水彩画纸。
步骤1——铅笔在纸上画。
对于一个复杂的图纸,我通常会做一个跟踪我的小照片,然后用我的复制机器,我放大图像,复制这到我的水彩纸。我把画在一个大的。阳光明媚的窗口,磁带wc纸在绘画,然后跟踪图像。
第二步——颜色字段
我在油漆层,所以第一步是画第一层。我把这叫做我的“基本层”,因为我画的颜色主题,尽管有一些品种。这样做是在部分,画其他的玫瑰花瓣。让每一节完全干燥之前画旁边的部分。,否则颜色会运行。
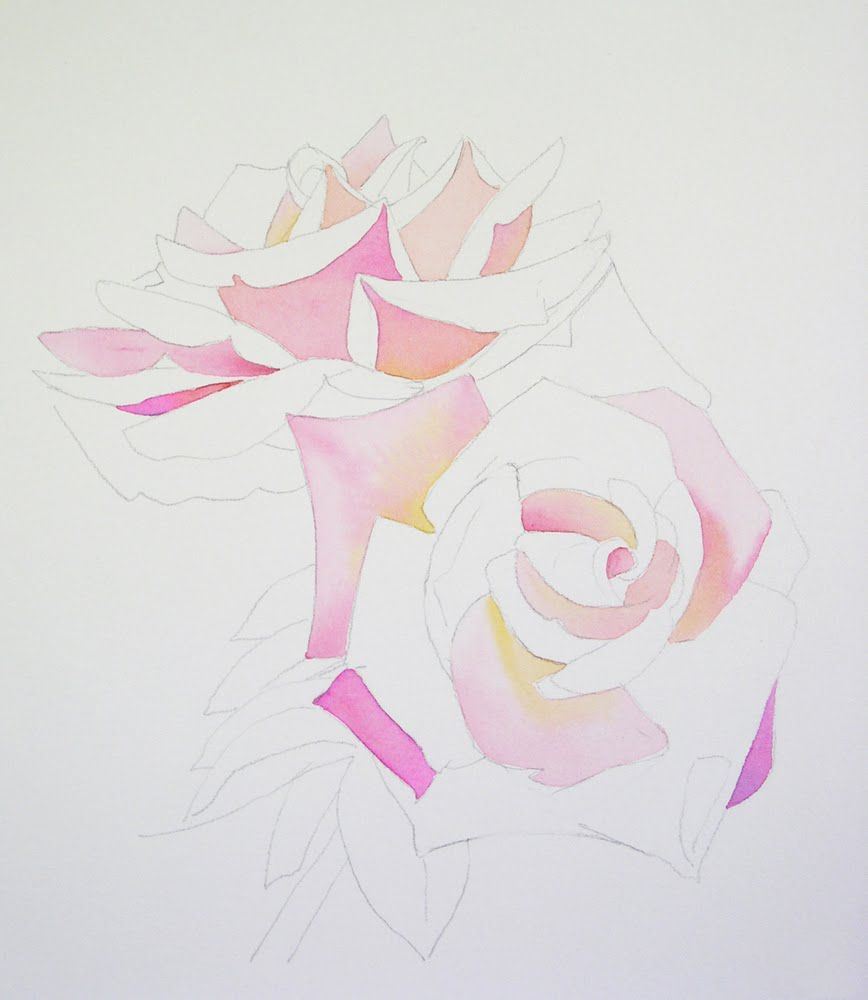
我让颜色混合和湿压湿印刷技术,要么:
a .润湿面积与水,然后触摸颜色,
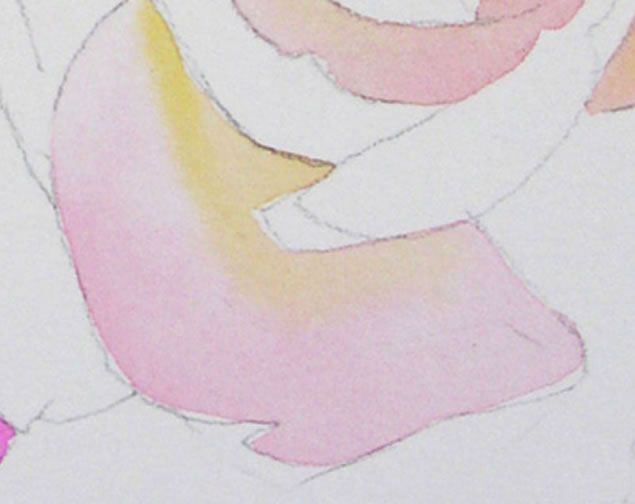
或
b .躺在一个彩色的洗,然后添加第二个和第三个颜色。有时
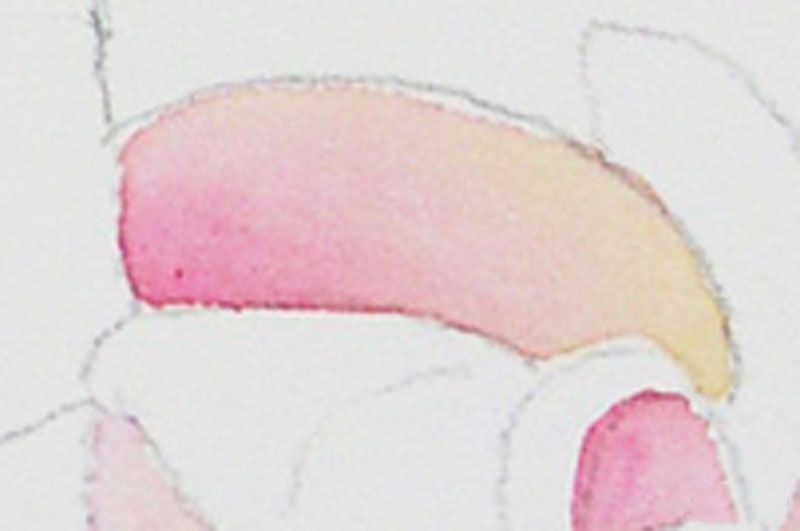
我使用这两种技术在这水彩画。他们会给出相同的结果。记住,颜料流与水,让水做这个工作!
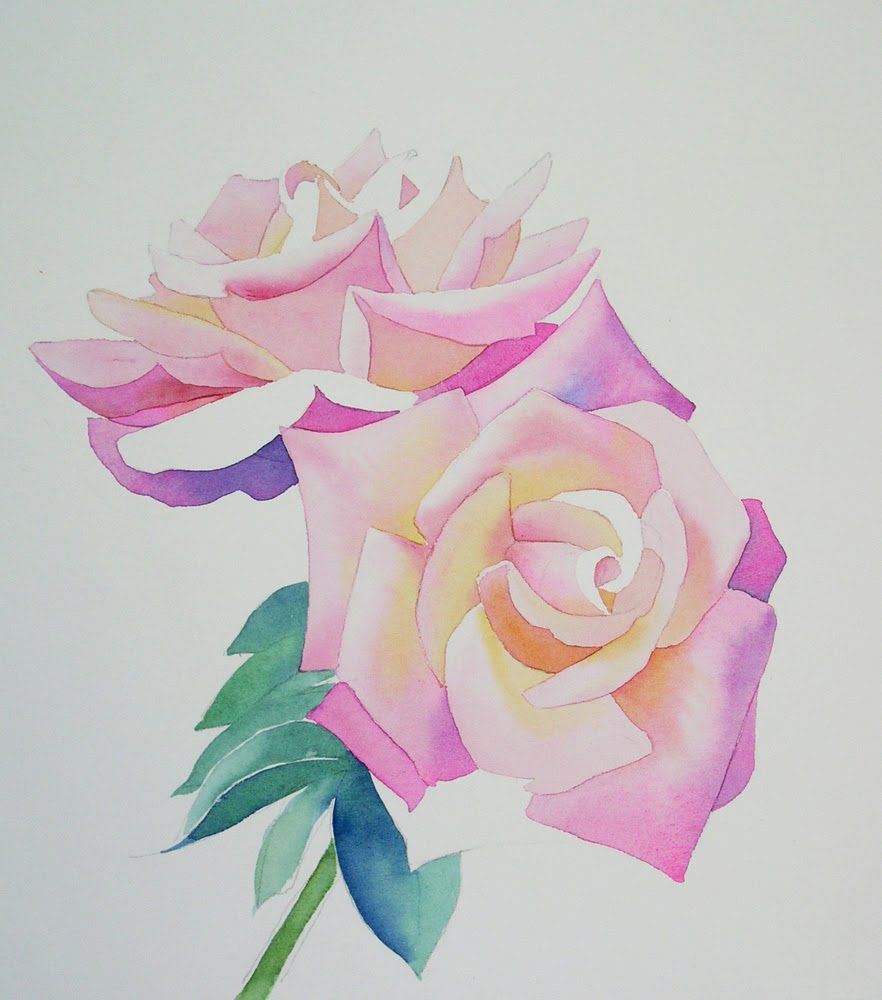
稳扎稳打,玫瑰是成形。我画花瓣使用妓女绿色和Pthalo蓝色,绿色颜料的茎。不要害怕使用丰富的和/或暗的颜色在这第一步。
当玫瑰是完全涂上第一层,干燥,我绘制背景,在这种情况下一个白点色场,再涂湿压湿印刷。我用镉柠檬,妓女绿色,孔雀蓝,普鲁士蓝,永久的玫瑰,歌剧,和Dioxazine紫。
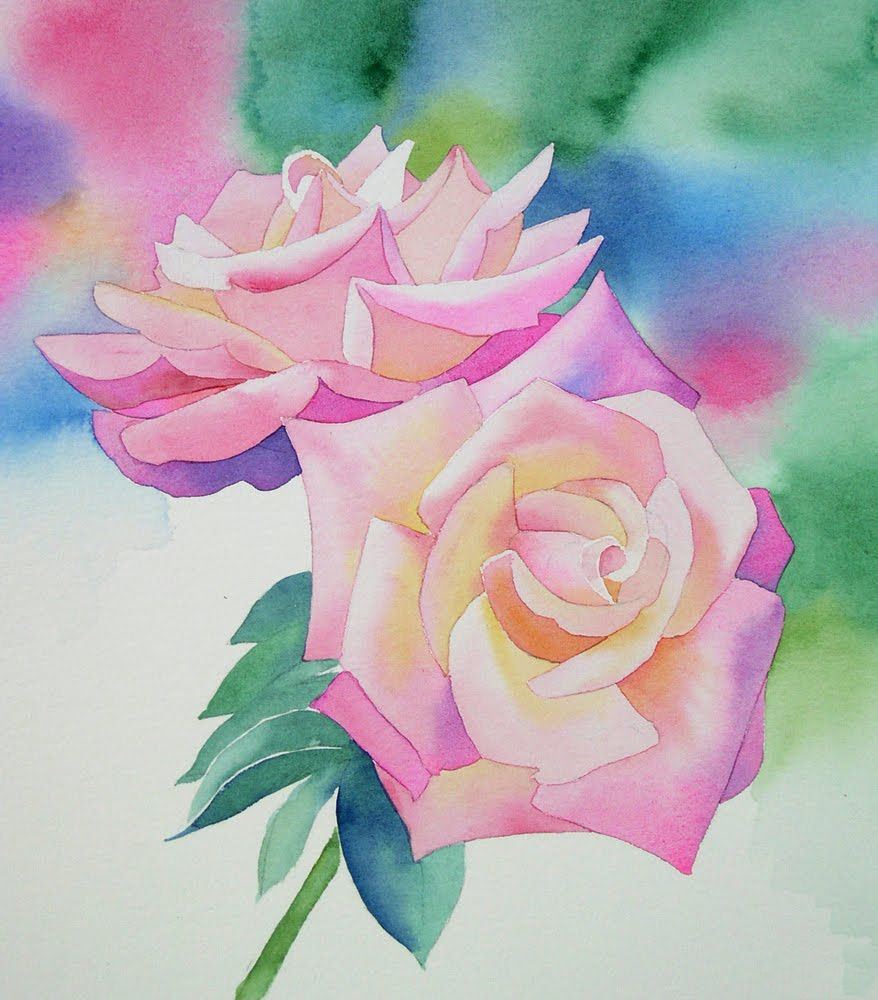
得到这个淡的效果,湿整个背景区域,然后把颜色互相旁边。倾斜的纸让颜色混合,但是不要做太多的笔法。
步骤3 -阴影
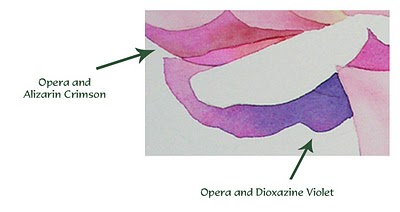
一旦第一层颜色是放下,我继续画阴影。通常在一朵花的阴影是相同的颜色我已经使用,只有黑暗,有时有点紫色(灰色颜色)或钴蓝色(冷却颜色)。这些玫瑰是一个很酷的粉红色,然而,底部的花瓣和室内很温暖——黄色、珊瑚、和橘子。因此,对于这些花,我用Dioxazine紫罗兰和二氢喹吖啶紫油漆阴影外面的花瓣,大红和二氢喹吖啶红为室内的花。
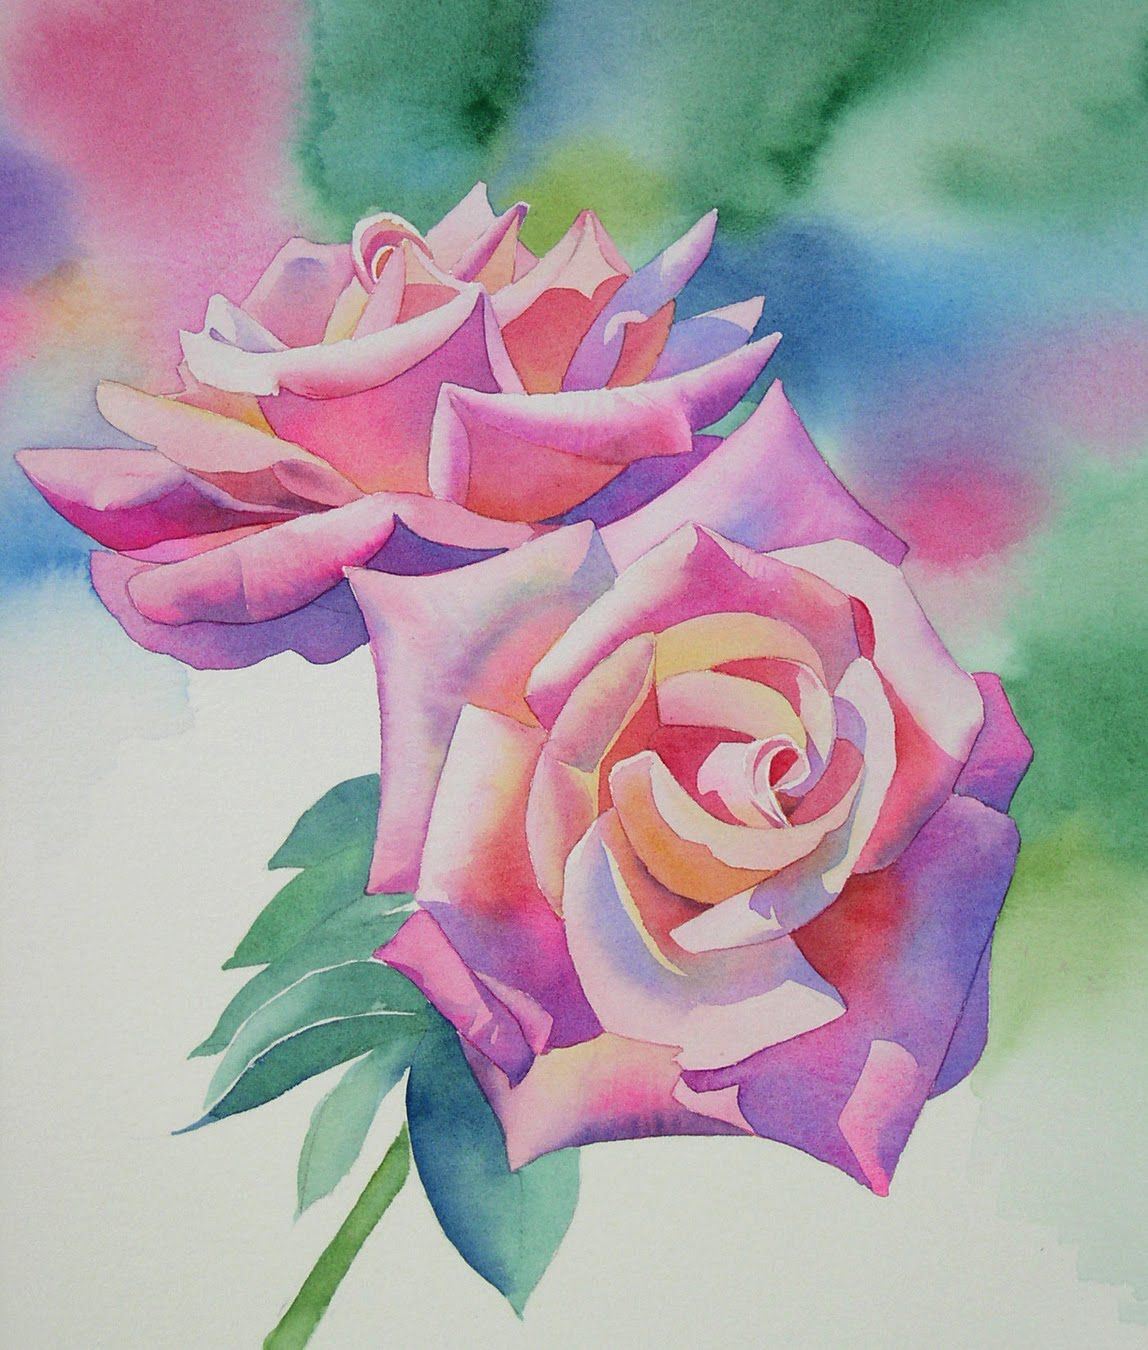
就像我画步骤1,我画阴影湿压湿印刷,让颜料混合在页面上。
步骤4——更深的颜色
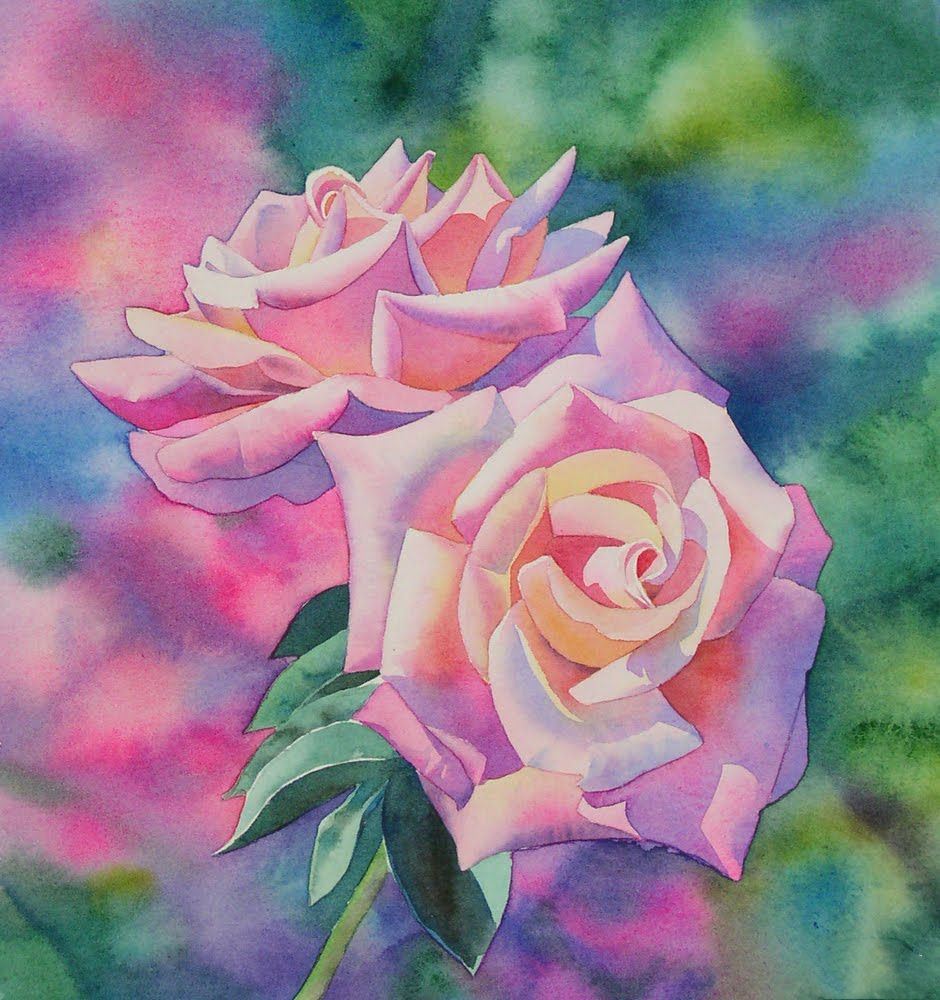
背景:我画了另一层的背景,这使它非常黑暗,但具有美观、色彩丰富。我添加了水滴到湿颜料在这里和那里。水把颜料回来并创建这个失焦斑点效应。
这项技术使得非常不同的效果取决于湿纸,所以实践这一点。同时,颜料的反应是不同的,这取决于他们的染色*质量。
*许多水彩颜料分为染色或粒状的颜色。这是一个完全不同的“科学”的水彩画,我不太参与。可能有更多的信息在互联网上,如果你有兴趣。
当背景是干的,我再去与一个鲜活的孔雀蓝。这种结合所有的颜色和视觉上向后推明亮的粉红色和黄色。我们不希望这些争夺注意力与鲜花。孔雀蓝色是一个很不错的颜色,似乎在大多数其他颜色层漂亮。
第五步细节,细节
我用一层漆(颜色相同)来提高颜色在最黑暗的地区,仍然湿压湿印刷油画。我非常非常轻油漆在刀口上一些花瓣。最后我添加一个小摸的Dioxazine紫在很黑暗的地区瞧!一个郁郁葱葱的和明亮的一双玫瑰!
原文如下:
Watercolor Painting Demonstration by Barbara Fox – “Dreamy Pinks”
(Click Images For Larger View)
Dreamy Pinks watercolor 9 x 10"
Dreamy Pinks Painting Demonstration
Paints used for this watercolor painting: Winsor Newton and M. Graham, Holbein where noted.
Cadmium Lemon
New Gamboge
Sap Green
Hookers Green
Peacock Blue (Holbein)
Cobalt Blue
Prussian Blue
Dioxazine Purple
Permanent Rose
Opera (Holbein)
Quinacridone Red
Quinacridone Violet
Alizarin Crimson
Paper I use is Jack Richeson 300 lb cold press watercolor paper.
Step 1 – pencil drawing on the paper.
For a complicated drawing like this, I usually do a tracing of my little photograph, then using my copy machine, I enlarge the image and copy this onto my watercolor paper. I hang the drawing on a big. sunny window, tape the wc paper over the drawing, then trace the image.
Step 2 -the color field
I paint in layers, so step one is painting the first layer. I call this my “base layer”, because I am painting the color of the subject, albeit with some variety. This is done in sections, painting every other petal, for the rose. Let each section dry completely before painting the section next to it., otherwise the colors will run.
I let the colors blend with a wet-on-wet technique, either:
A. wetting an area with water, then touching the colors on it,
or
B. laying in a colored wash, then adding the second and sometimes third color.
I used both techniques in this watercolor painting. They give the same results. Remember, the pigments flow with the water, so let the water do the work!
Slowly but surely, the roses are taking shape. I painted the petals using Hookers Green and Pthalo Blue, with Sap Green on the stem. Don’t be afraid to use rich and/or dark colors in this first step.
When the rose is completely painted with the first layer, and dry, I paint the background, in this case a spotty color field, again painted wet-on-wet. I used Cadmium Lemon, Hookers Green, Peacock Blue, Prussian Blue, Permanent Rose, Opera, and Dioxazine Violet.
To get this washy effect, wet the entire background area, then drop the colors next to each other . Tilt the paper to let the colors mix, but don’t do too much brushwork.
Step 3 – Shadows
Once the first layer of color is laid down, I proceed to paint the shadows. Usually the shadows on a flower are the same colors I’ve been using, only darker, and sometimes with a bit of purple (to grey the color) or cobalt blue (to cool the color). These roses are a cool pink, however, the underside of the petals and the interior is very warm- yellows, corals, and oranges. So, for these flowers, I used Dioxazine Violet and Quinacridone Violet to paint the shadows on the outside of the petals, and Alizarin Crimson and Quinacridone Red for the interior of the blossom.
Just as I painted STEP 1, I paint the shadows wet-on-wet, letting the pigments mix on the page.
Step 4- deeper colors
Background: I painted another layer of the background, making it very dark, but with beautiful, rich colors. I added drops of water onto the wet pigment here and there. The water pushes the pigment back and creates this out-of-focus mottled effect.
This technique makes very different effects depending on how wet the paper is, so practice it a bit. Also, the pigments react differently, depending on their staining* quality.
*Many watercolor paints are divided into Staining or Granular colors. It is a whole other “science“ of watercolor painting that I don‘t get too involved in. There is probably more information on the Internet, if you’re interested.
When the background was dry, I went over it again with a rich mixture of Peacock Blue. This unifies all the colors and visually pushes back the bright pinks and yellows. We don’t want those competing for attention with the flowers. Peacock Blue is one of those great colors that seems to layer beautifully over most other colors.
Step 5 -details, details
I use another layer of paint (the same colors) to enhance the colors in the darkest areas, still painting wet-on-wet. I very lightly paint the veins on some of the petals. Finally I add a small touch of Dioxazine Violet in the very darkest areas. Voila! A lush and luminous pair of roses!


