金色的玫瑰——如何画一脸红花在水彩画
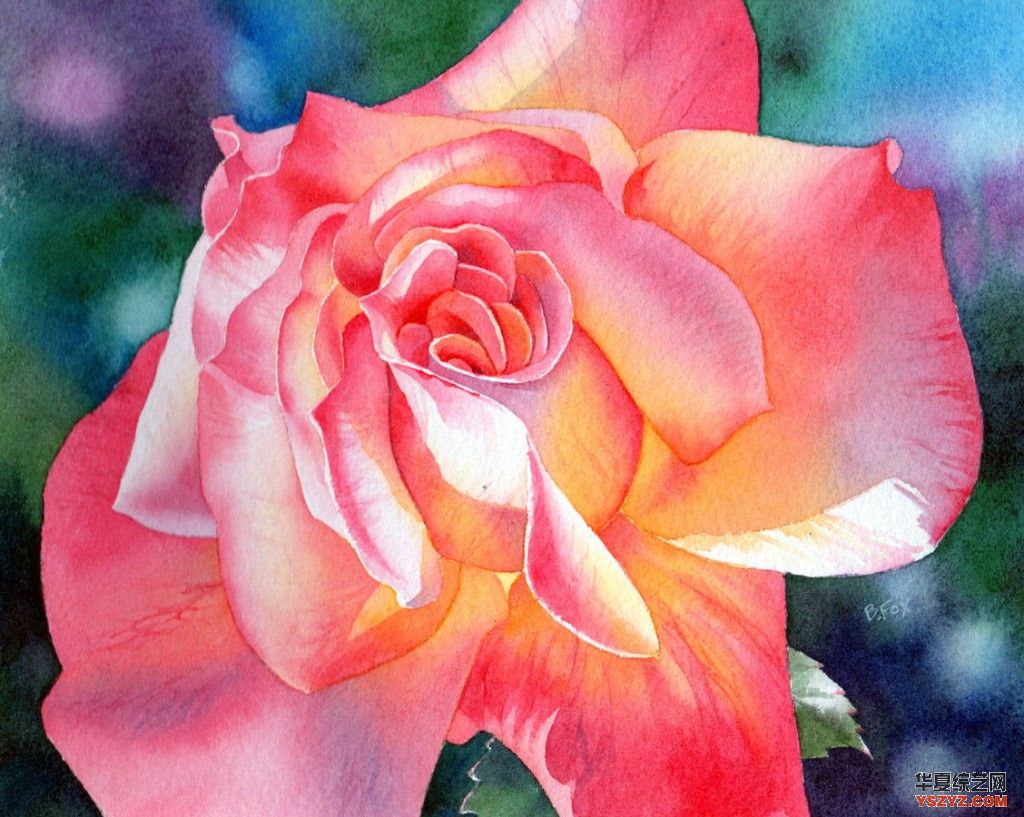
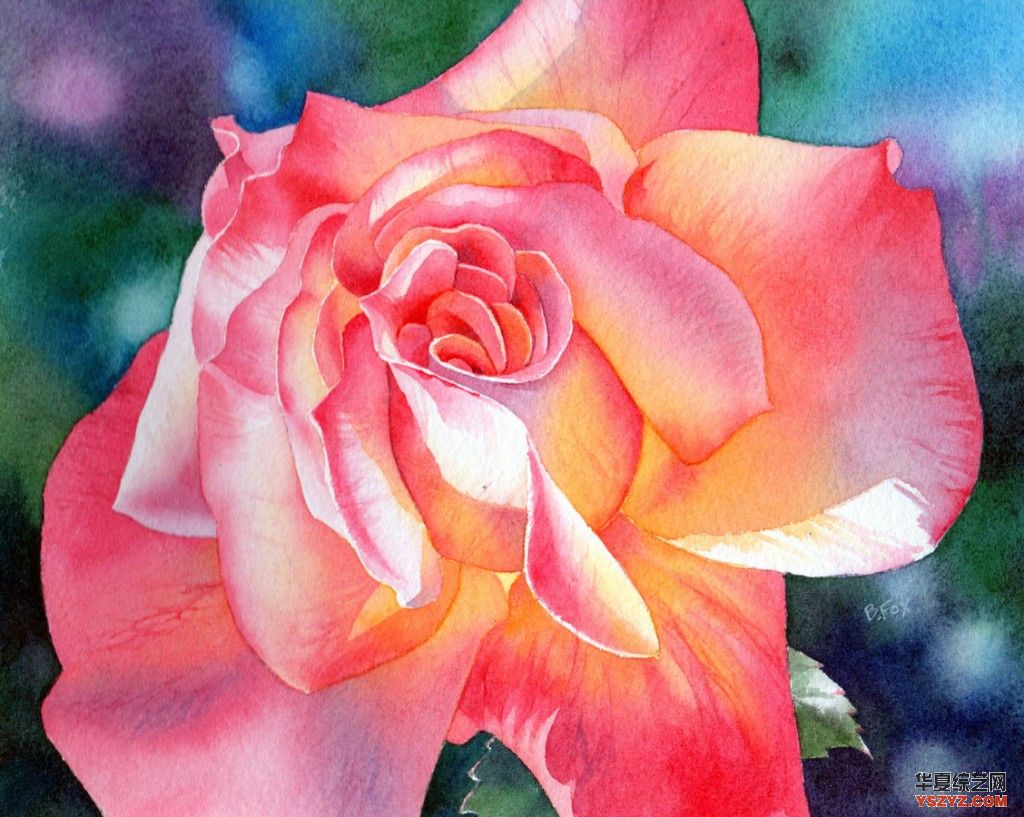
金色的玫瑰(出售)脸红水彩8×10“
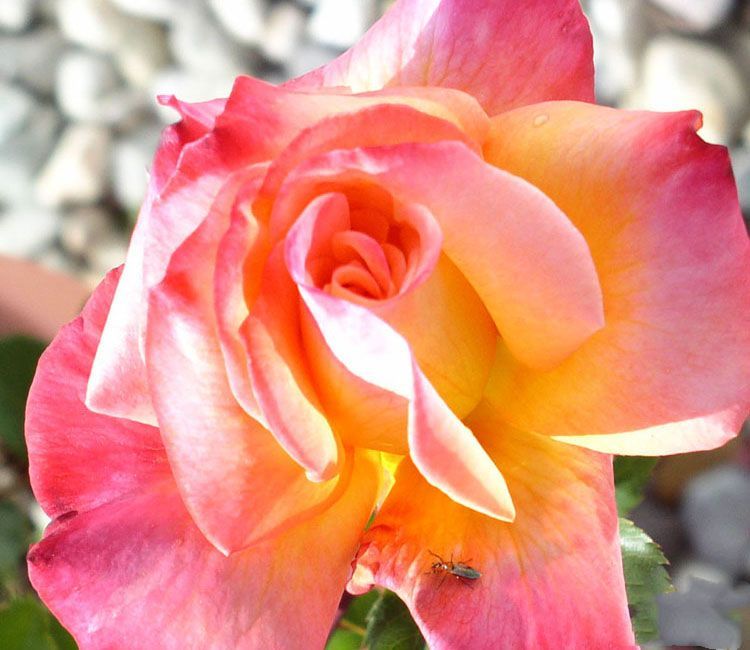
这是我使用的照片
油漆用于这幅画(温莎牛顿和m·格雷厄姆和幅霍尔拜因品牌):
- 暗绿色
- 妓女绿色
- 孔雀蓝色(幅霍尔拜因)
- 钴蓝色
- 深蓝色或法国海外的
- 温莎紫Dioxazine
- 永久玫瑰
- 二氢喹吖啶紫
- 二氢喹吖啶红
- 新藤黄
- 灯黑
纸是杰克Richeson 300磅冷压水彩画纸
步骤1——颜色字段
我在油漆层,所以第一步是铺设在第一层。我把这叫做我的“基本层”,因为我画的色彩主题,尽管一些品种。这样做是在部分,画其他的玫瑰花瓣。让每一节完全干燥之前画旁边的部分。
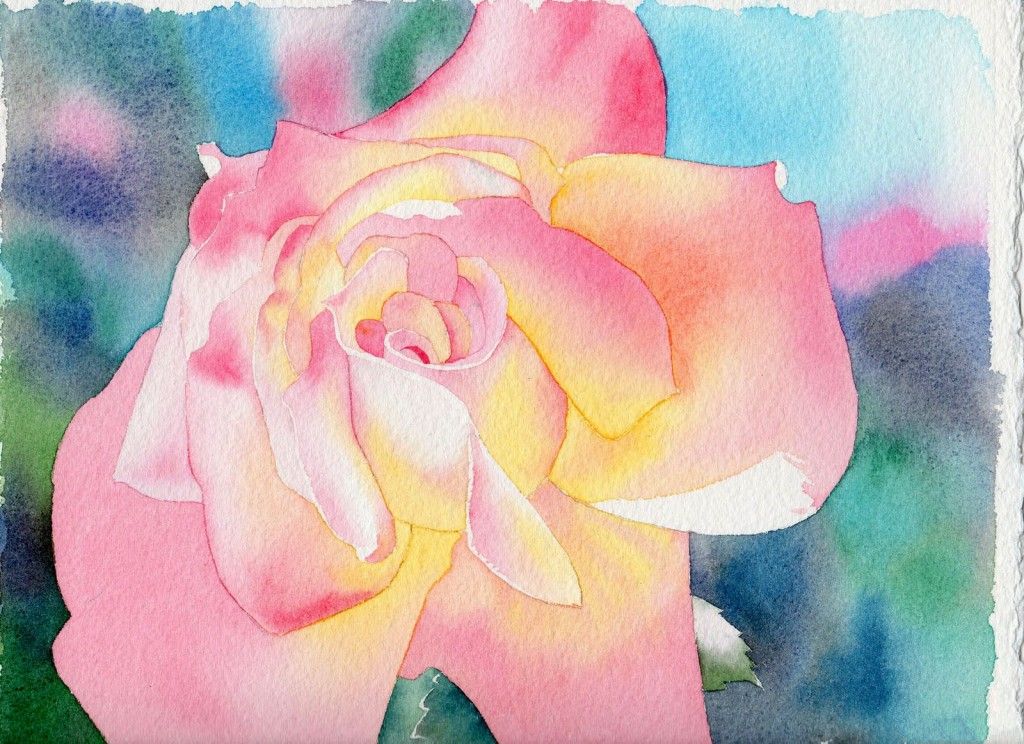
我让颜色混合和湿压湿印刷技术,要么
a .润湿面积与水,然后触摸颜色,
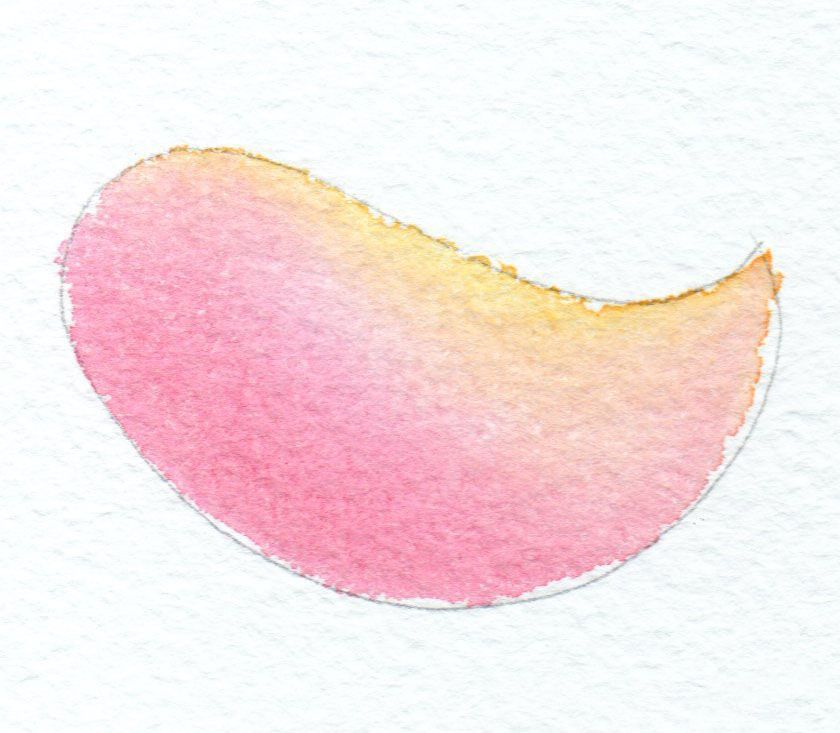
或
b .躺在一个彩色的洗,然后添加第二个和第三个颜色。
我使用这两种技术。
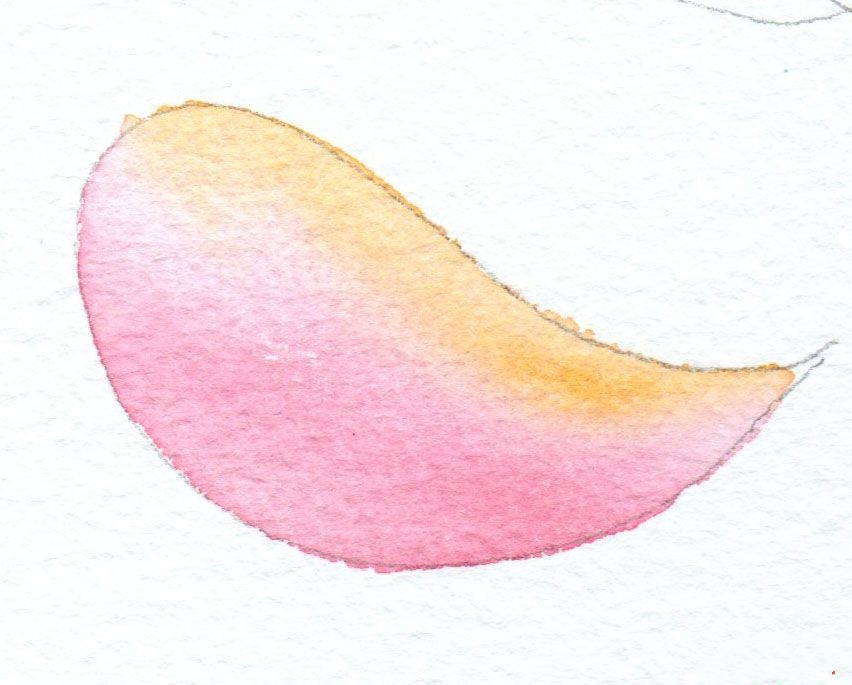
记住,颜料流与水,让水做这个工作!
当玫瑰是完全涂上第一层,干燥,我绘制背景,在这种情况下一个白点色场,再涂湿压湿印刷。我用妓女绿色,孔雀蓝,暗绿色,深蓝色,永久的玫瑰,和普鲁士蓝。
步骤2 -阴影
一旦颜色是放下,我继续画阴影。我不使用“阴影颜色”但漆什么颜色我看到。通常在一朵花的阴影是相同的颜色我已经使用,只有黑暗,有时有点紫色(灰色颜色)或钴蓝色(冷却颜色)投入。
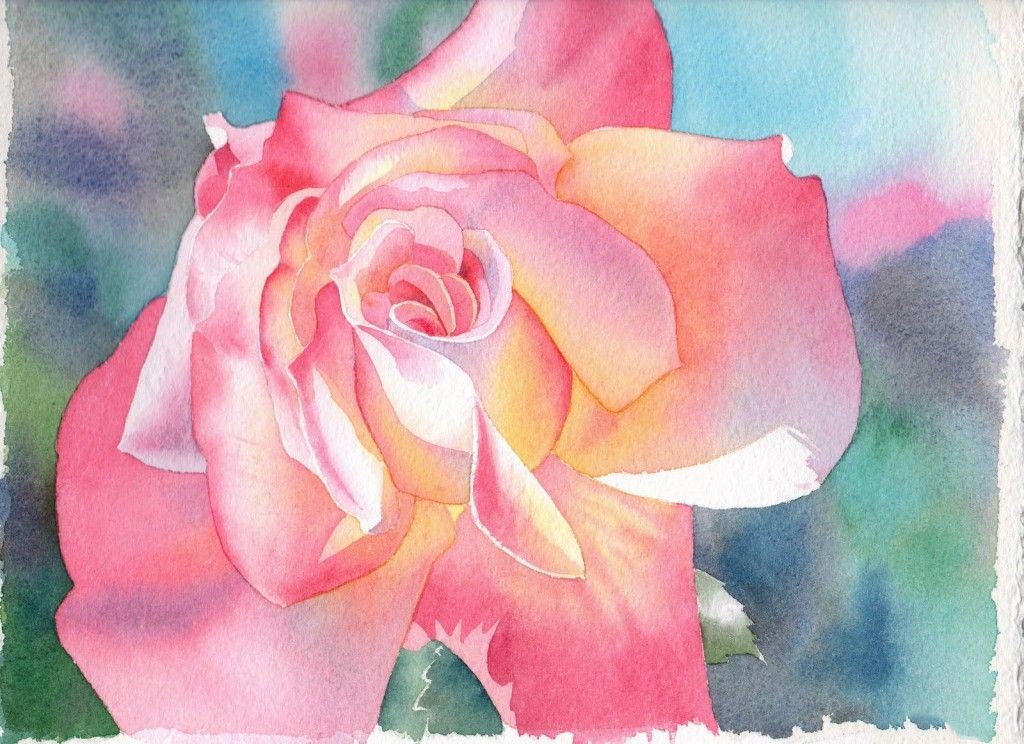
就像我画步骤1,我画阴影湿压湿印刷,让颜料混合在页面上。
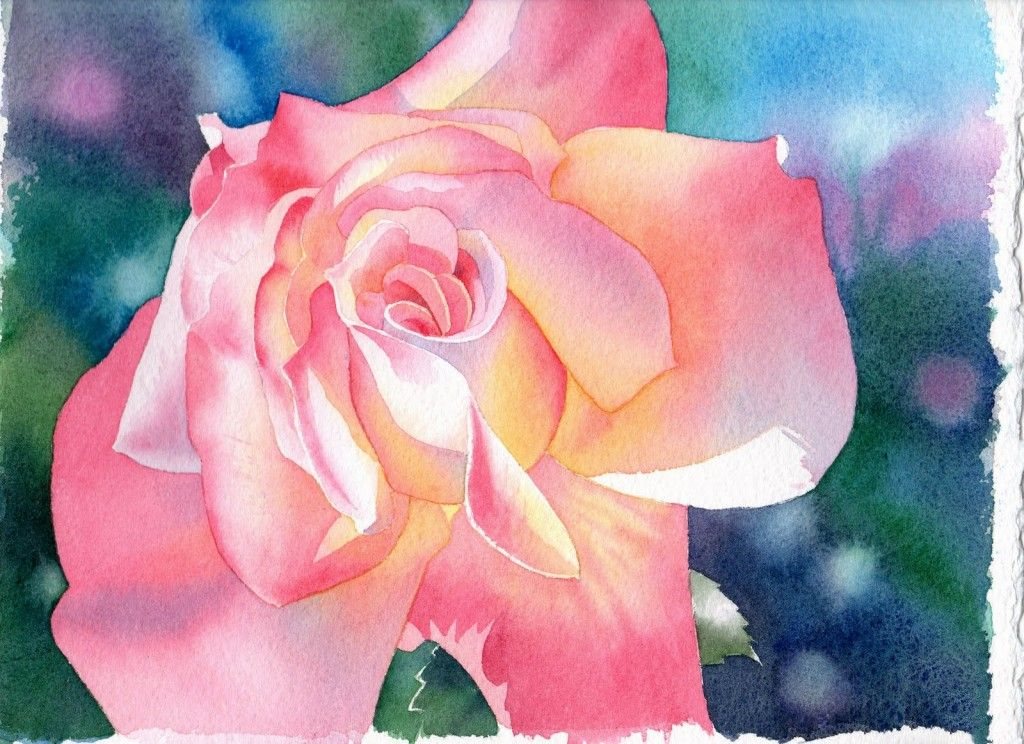
步骤3——更深的颜色
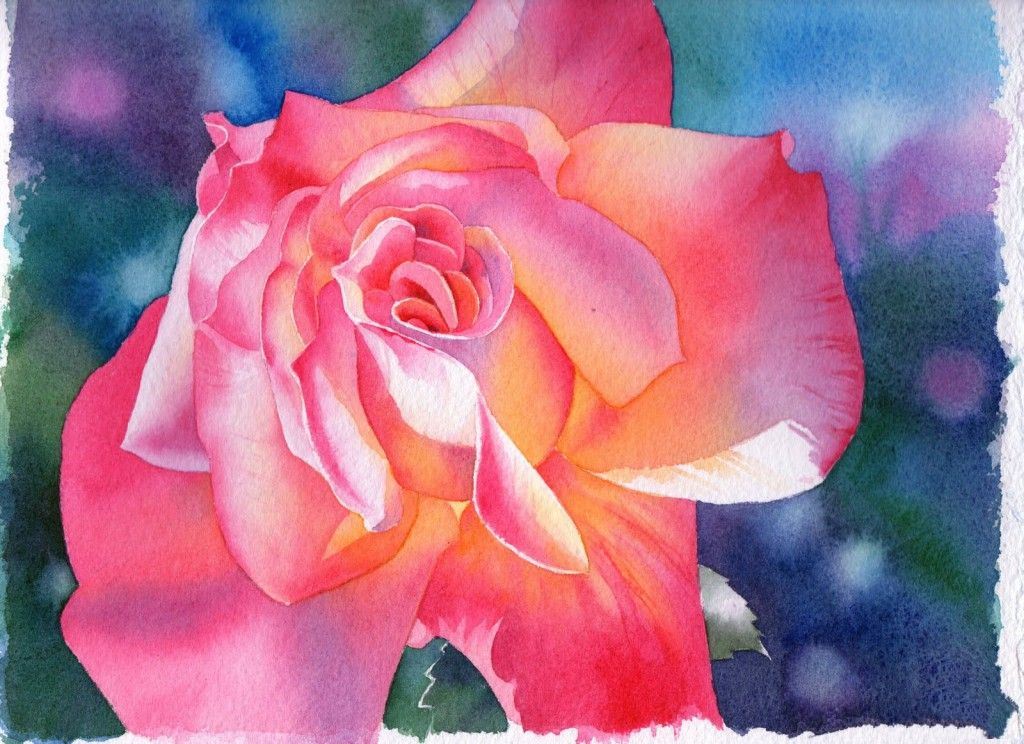
背景:我用黑色画第二个层时的背景。我觉得它的“锚”所有其他颜色在后台使用,因为它是如此黑暗,我没有画多个层只是为了得到一个好黑暗。我避免黑了很长时间,但欣赏,它为我节省了不少时间。
轻的区域是由接触湿颜色区域用干纸巾,然后添加一个下降或2的水。水把颜料回来。
这项技术使得非常不同的效果取决于湿纸,所以实践这一点。颜料也有不同的反应;染色颜料喜欢留在原地。
我用一层漆(颜色相同)来提高颜色,还是绘画湿压湿印刷。有人问“不上的油漆纸上来当你涂上油漆吗?”。
它不应该,如果:
你使用质量好的纸
和
你别碰水了太多和你刷。你可以引导它用刷子,但是过多的刷牙会松开干漆。
我有点忘形了,开始画一些脉络和其他结构细节的一些花瓣。看看这朵花看起来更具活力和更丰富的色彩吗?
我也加了些黑色的背景。值和颜色加深在一个领域,它可能使色彩和价值在其他领域显得软弱。这就是为什么我喜欢这个分层的过程,喜欢工作整个画;我可以不断调整颜色和价值观作为我的工作

最后,我添加一些纹理和脉络,使黑暗的红色区域真的黑暗。
它现在看起来发光、多彩、现实三维。
原文如下:
Golden Blush Rose - How to Paint a Flower in Watercolour
Golden Blush Rose (SOLD) watercolor 8 x 10"
Here’s the photograph I used
Paints used for this painting( Winsor Newton and M. Graham and Holbein Brands):
Sap Green
Hookers Green
Peacock Blue (Holbein)
Cobalt Blue
Ultramarine Blue or French Ultramarine
Winsor Violet Dioxazine
Permanent Rose
Quinacridone Violet
Quinacridone Red
New Gamboge
Lamp Black
Paper is Jack Richeson 300 lb cold press watercolor paper
Step 1 -the color field
I paint in layers, so step one is laying in the first layer. I call this my “base layer”, because I am painting the color of the subject, albeit with some variety. This is done in sections, painting every other petal, for the rose. Let each section dry completely before painting the section next to it.
I let the colors blend with a wet-on-wet technique, either
A. wetting an area with water, then touching the colors on it,
OR
B. laying in a colored wash, then adding the second and third colors.
I use both techniques.
Remember, the pigments flow with the water, so let the water do the work!
When the rose is completely painted with the first layer, and dry, I paint the background, in this case a spotty color field, again painted wet-on-wet. I used Hookers green, Peacock Blue, Sap Green, Ultramarine Blue, Permanent Rose, and Prussian Blue.
Step 2 – shadows
Once the color is laid down, I proceed to paint the shadows. I don’t use a “shadow color” but paint what colors I see. Usually the shadows on a flower are the same colors I’ve been using, only darker, and sometimes with a bit of purple (to grey the color) or cobalt blue (to cool the color) put in.
Just as I painted step 1, I paint the shadows wet-on-wet, letting the pigments mix on the page.
Step 3- deeper colors
Background: I use black when painting the second layer of the background. I feel like it “anchors” all the other colors used in the background, and because it is so dark, I don’t have to paint multiple layers just to get a good dark. I avoided black for a long time, but appreciate that it saves me a lot of time.
The lighter areas are made by touching the wet colored area with a dry paper towel, then adding a drop or 2 of water. The water pushes the pigment back.
This technique makes very different effects depending on how wet the paper is, so practice it a bit. Pigments also react differently; the staining color pigments like to stay put.
I use another layer of paint (the same colors) to enhance the colors, still painting wet-on-wet. People ask “doesn’t the paint on the paper come up when you paint over it?”.
It shouldn’t, if:
You use good quality paper
And
You don’t push the water around too much with your brush. You can guide it with the brush, but too much brushing will loosen the dried paint.
I got a little carried away and began painting some veining and other textural details on some of the petals. See how much more vibrant the flower looks with richer color?
I also added a bit more black to the background. As the values and color deepen in one area, it may make the colors and values in other areas look weak. That is why I like this layered process, and like to work the whole painting; I can constantly adjust colors and values as I’m working
Finally, I add some textures and veining, and make the dark red areas really dark.
It now looks luminous, colorful, and realistically 3 dimensional.


