步骤17
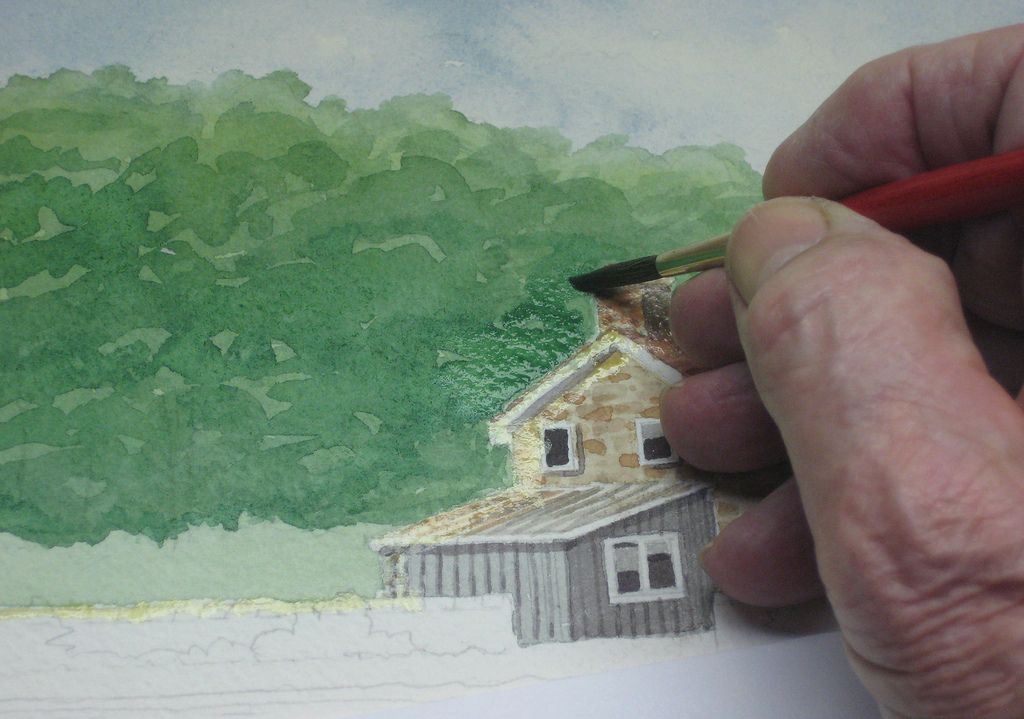
接下来我们开始画在背景树木,使用相同的技术从我们最近的树项目。首先选择消极的绘画领域。请注意我们有遗漏了对以后的工作低对冲。使用# 4或6轮刷装满色彩。因为这些树是在背景他们将包含更多的蓝色比我们的前台混合。与别墅保护液体掩蔽,你可以画上很自如的边缘。接下来我们开始画在背景树木,使用相同的技术从我们最近的树项目。首先选择消极的绘画领域。请注意我们有遗漏了对以后的工作低对冲。使用# 4或6轮刷装满色彩。因为这些树是在背景他们将包含更多的蓝色比我们的前台混合。与别墅保护液体掩蔽,你可以画上很自如的边缘。
步骤18
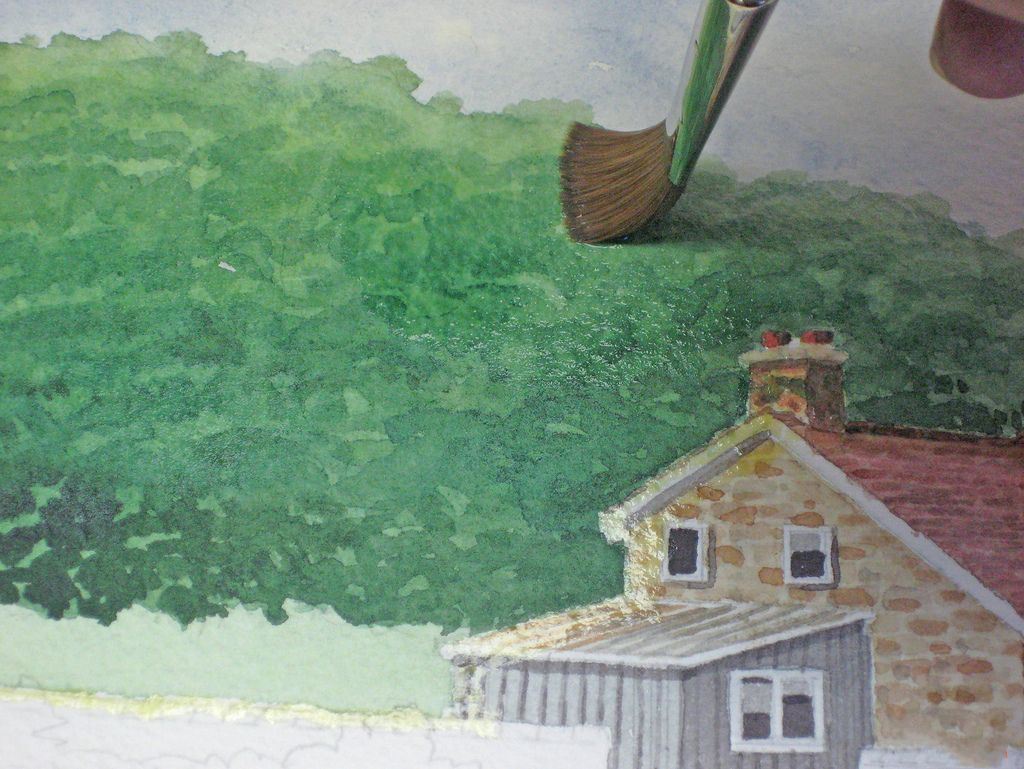
在第二次层混合所有这样洗的干净的水使用1/2“平方刷。
步骤19
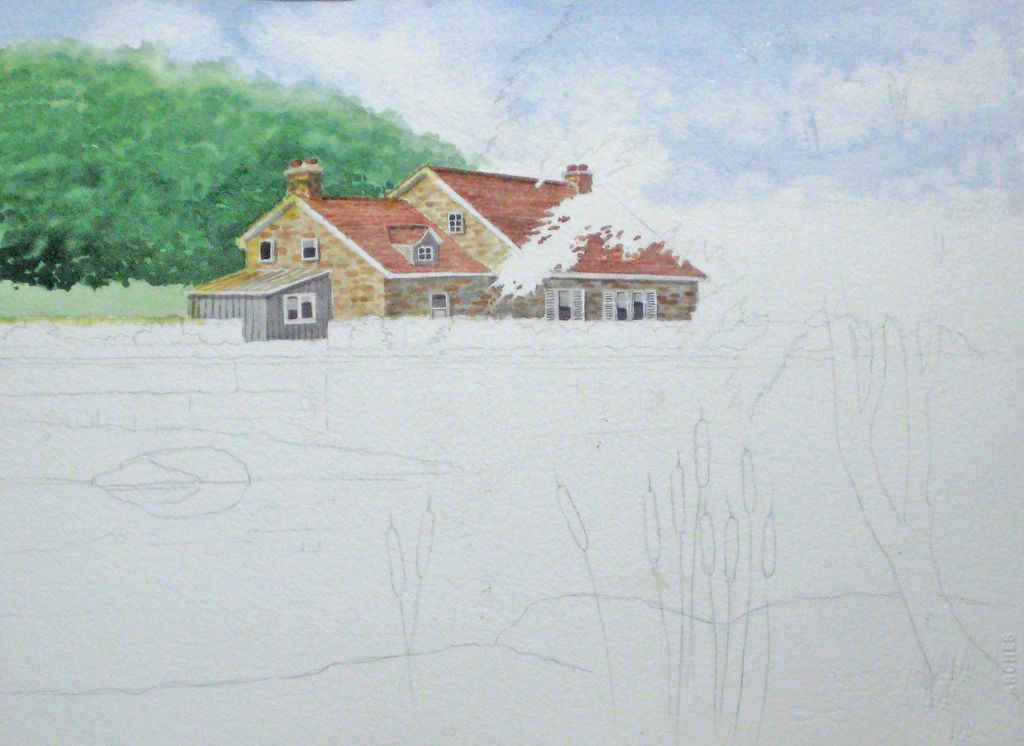
一些强调降低树木变得黑暗,退后一步,查看结果。你应该轻轻软化顶部的背景树和确保没有意外的形状需要治疗。
一步20
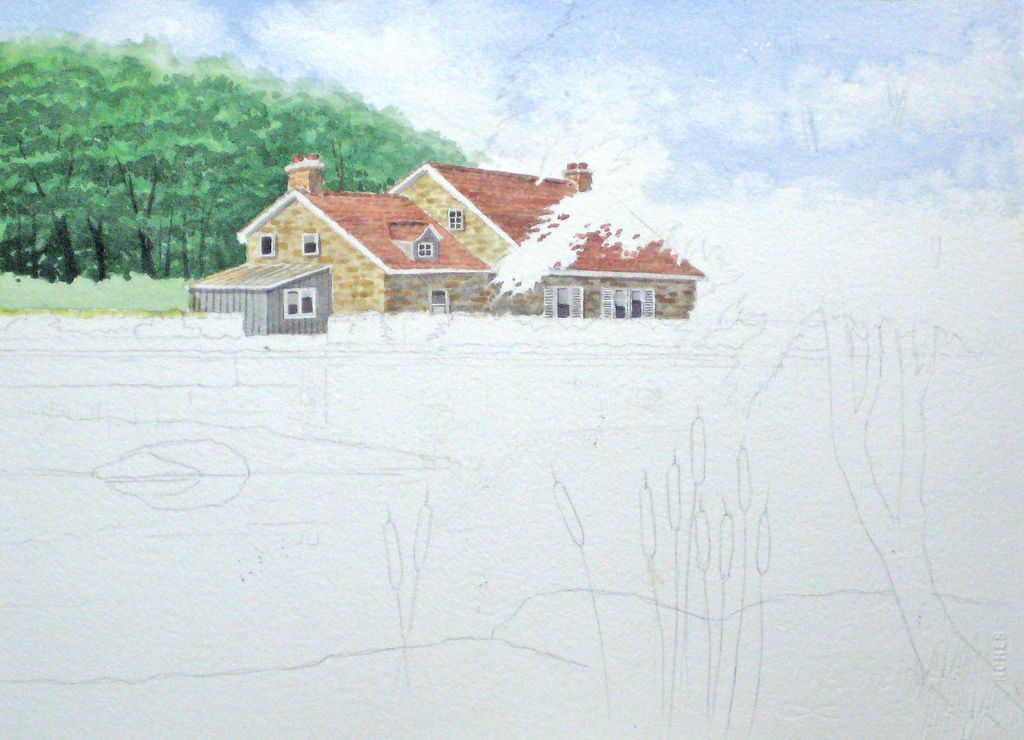
现在显示一些树干与确实在我们之前的树会话。让遥远的树干小和薄指示角度和距离。取出液体掩蔽除了低墙。
步骤21

块在前台树以# 6轮或1/2“角刷,洗由Aureolin黄色,绿色颜料,一个触摸的安特卫普蓝色和我们基本的阴影颜色。切换到一个# 4圆刷,树叶满足别墅和湖。
步骤22
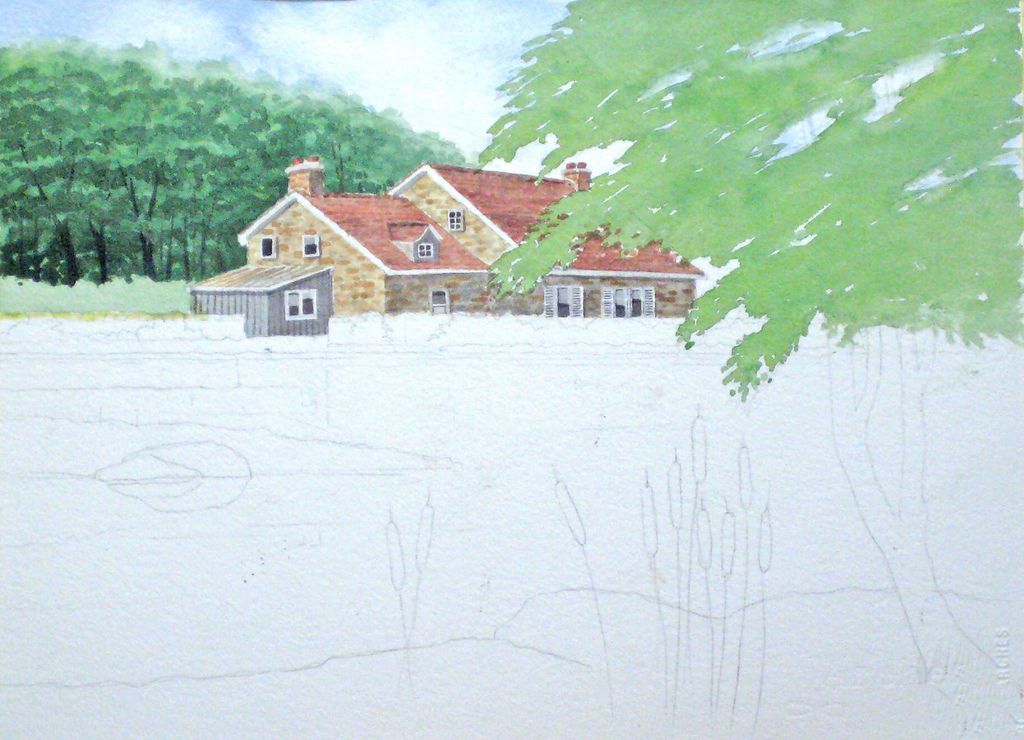
下面是它应该。注意一些开放区域在树叶上,天空和树分支出现。
步骤23
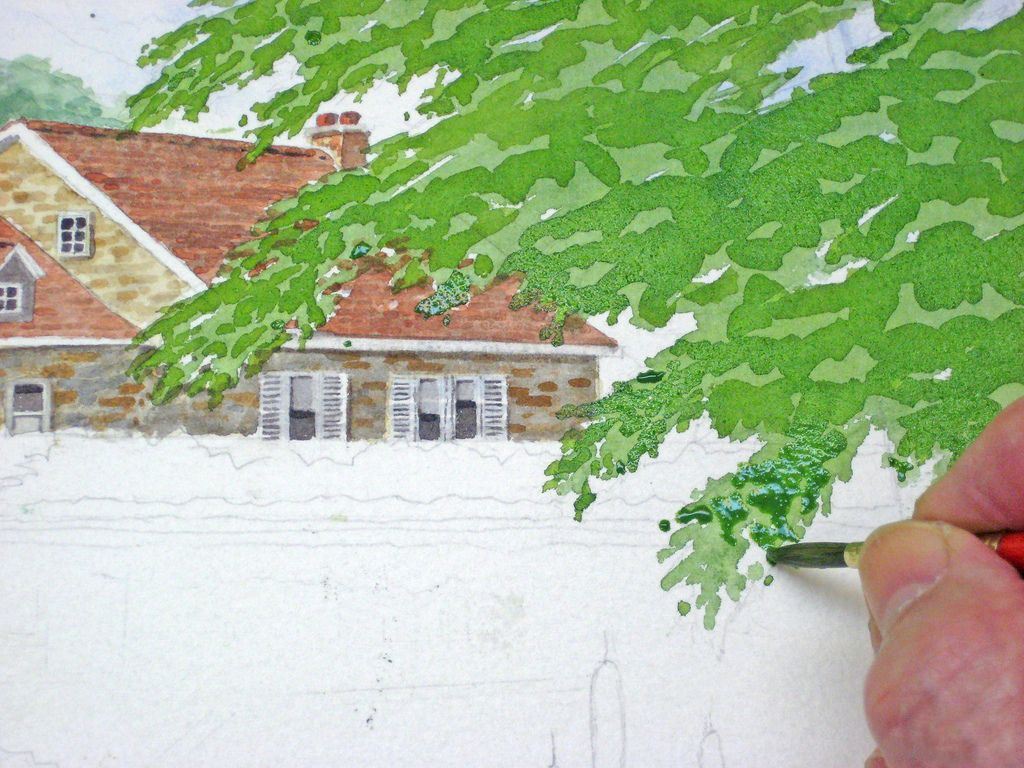
使用我们的树叶技术再次,块在第二个层用# 6轮刷。Antwep笼罩在绿色与蓝色的和我们的阴影颜色。保持你的刷满颜色在这个阶段。
一步24
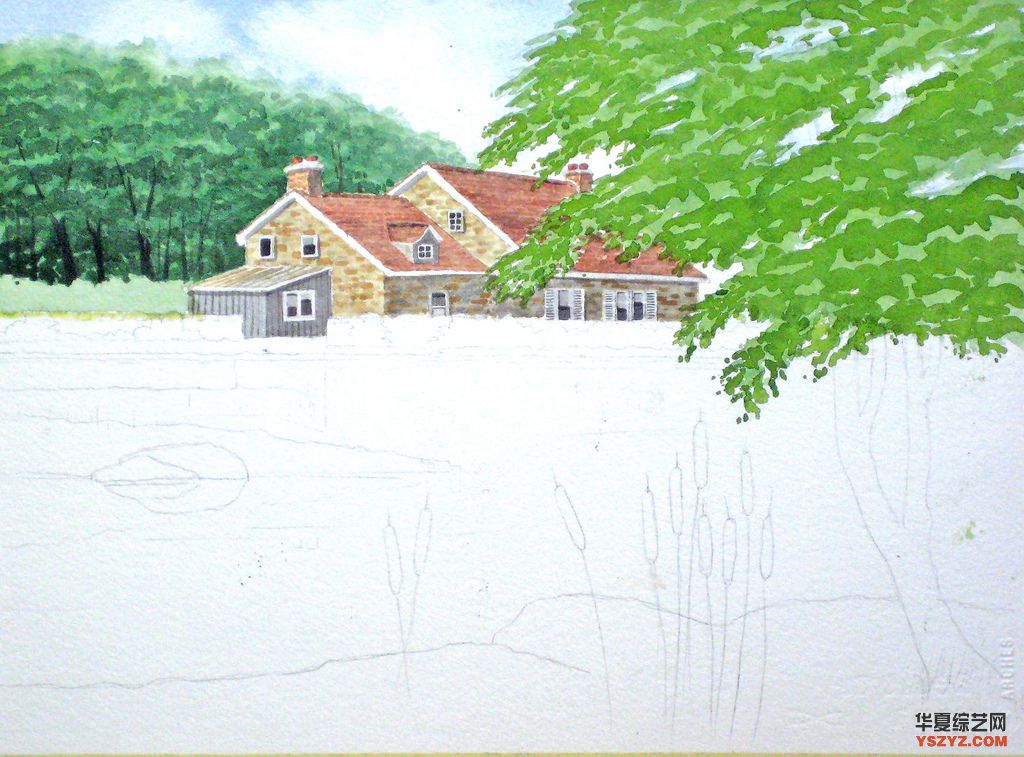
这是第二层,正如我们在我们的树项目。
步骤25
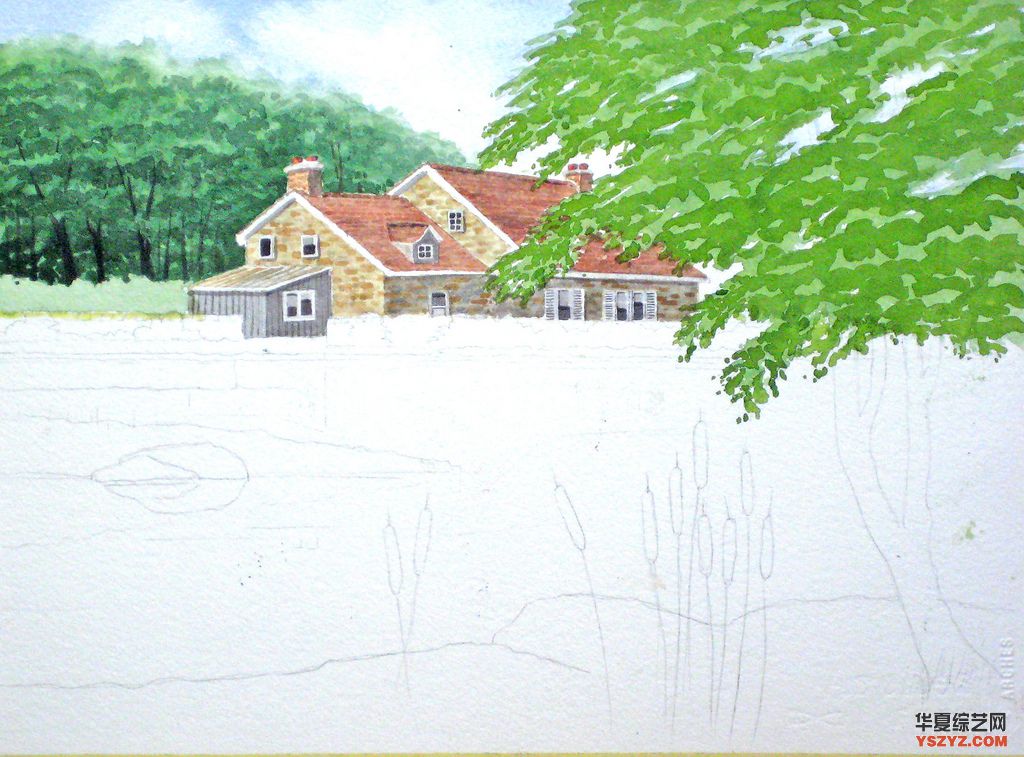
第三层使用颜色更深的绿色。使用# 6轮刷满色彩,开始挑出负面的绘画领域就像我们在我们的树项目。这里有足够的范围为个人风格为您尝试创建一个更小的叶结构比我们此前的树叶项目。涂上颜色,偶尔回去滴点颜色成部分干燥的地方。保持退到后面,确保整体效果是你想要的。有疑问时,半闭上眼睛,斜眼看它。这减少了色调值,帮助你正确的任何明显的区域色彩或位置不当。
一步26
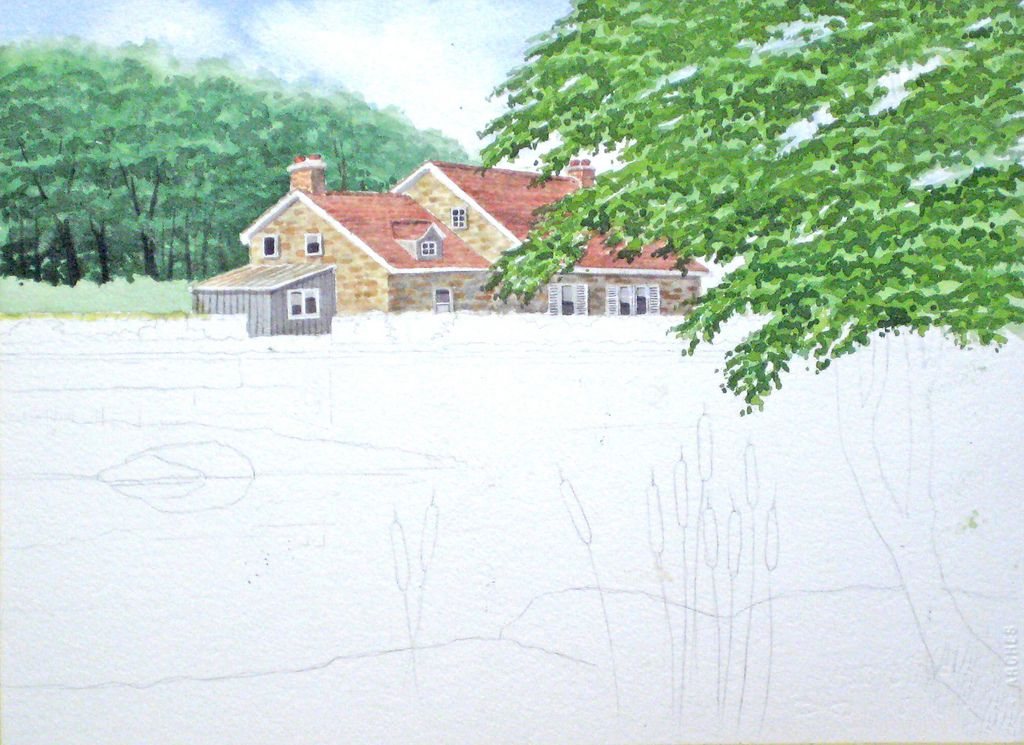
我们的第三层看起来应该像这样。
一步27
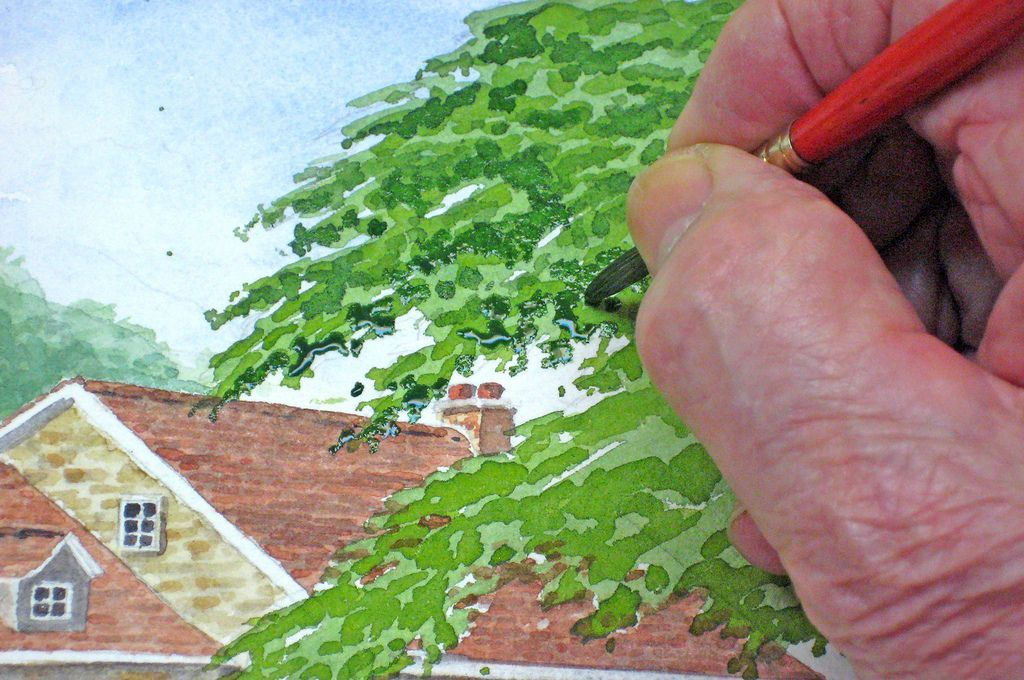
我们的第四层是应用使用一个满载# 4、# 6圆刷,一个黑暗的混合物的基本绿色。再次,找出这些区域负痛技术。你如何做这将取于你的个人风格。保持退到后面,查看结果。不要那么急。
一步28
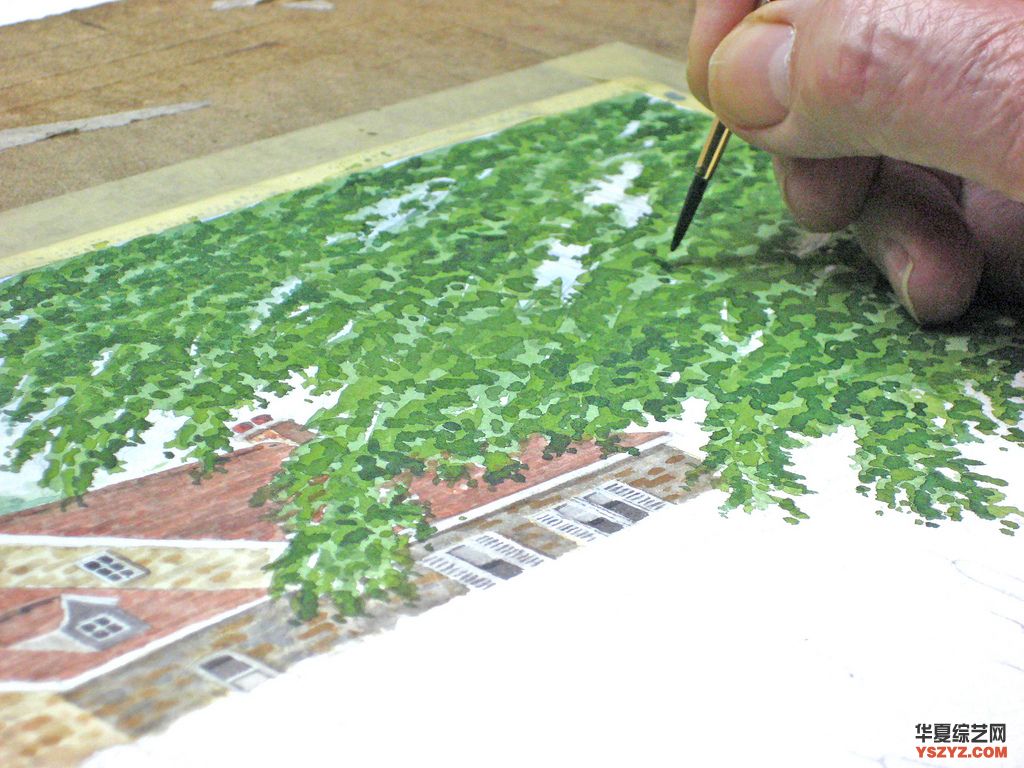
保持你的# 4、# 6刷如图所示,保持你的手腕在纸上最大的杠杆,和与你满载刷涂直下。回去偶尔掉一些颜色在景点不是很干混合的技术。
一步29
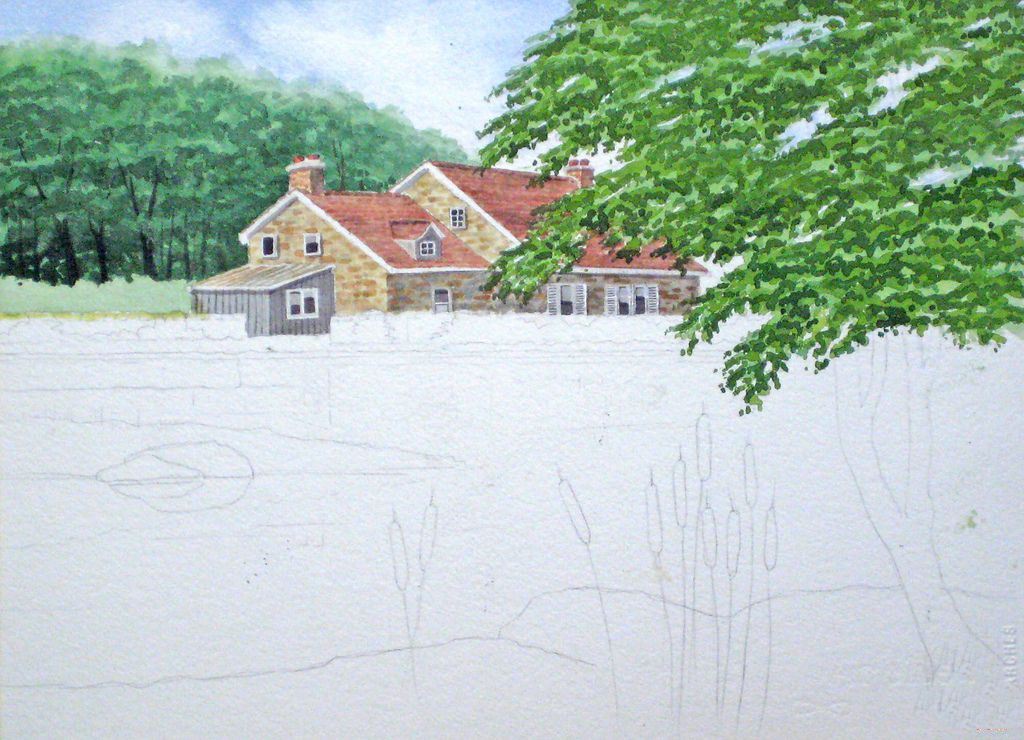
这就是它看起来应该在这个阶段。以后你可以回去修改这个适合你的个人风格。今天就到这。收听剩余图片再次。
一步30
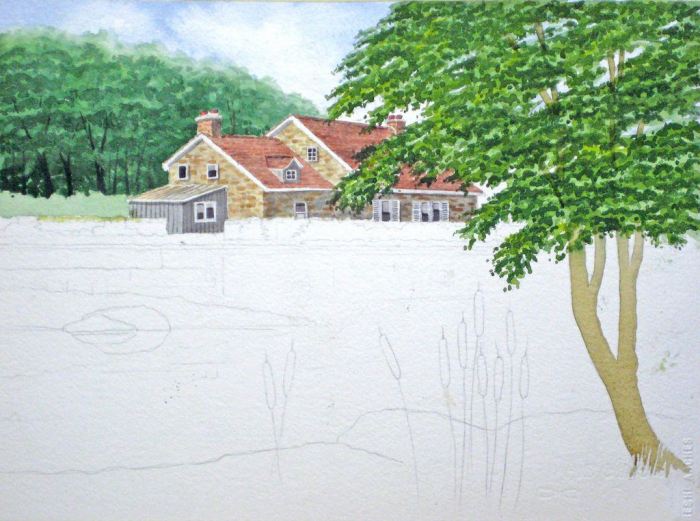
现在我们开始阻塞在前台的树干,使用洗生黄土,一个触摸的棕色茜草和黑暗的与我们的基本的影子混合物。注意树枝出现去躲在叶子。这对我们比较原始树项目对于这种技术
步骤31
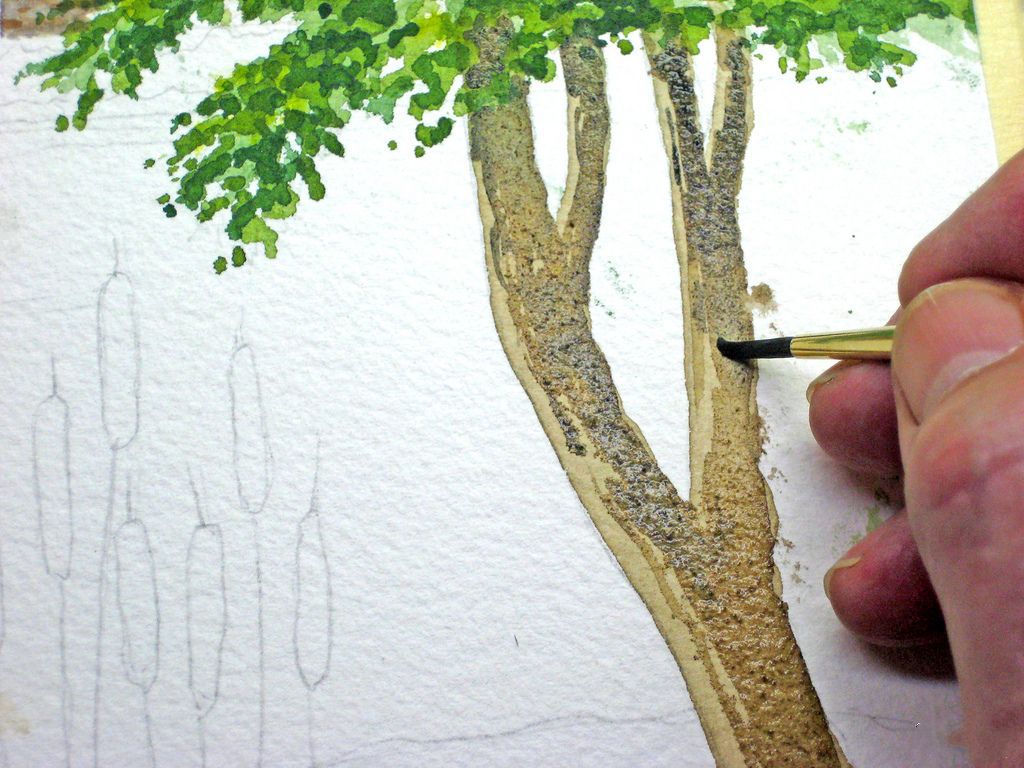
工作在树干会给足够的机会来发展自己的风格和技术,但在这里我工作在潮湿湿使用# 4轮刷好装满一个强大的阴影颜色由蓝色和棕色茜草安特卫普。底部的箱子我离开一些消极的绘画领域,后来草出现。还要注意的点在我刷都是我不小心。没关系,用干净的水和一个刷我能举起这个与我们的污点和电梯技术。300磅纸是非常宽容的。
步骤32
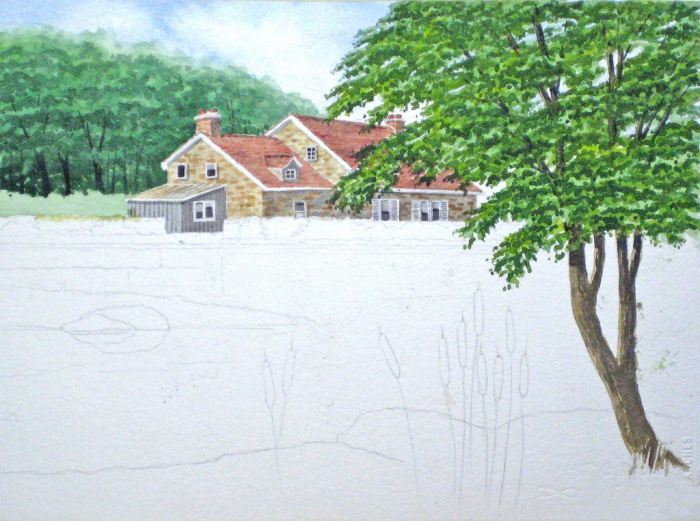
完成的树干和树枝。后来修改可能需要根据完成的绘画。在这个项目中有大量机会你自己的解释,这些图片是你的指导只有。每个学生将会带来一种不同的方法,无论在色彩、色调值和一般的外观。没有“正确”的方式在水彩画的现实主义,现实主义的程度将取决于你决定创建。
步骤33
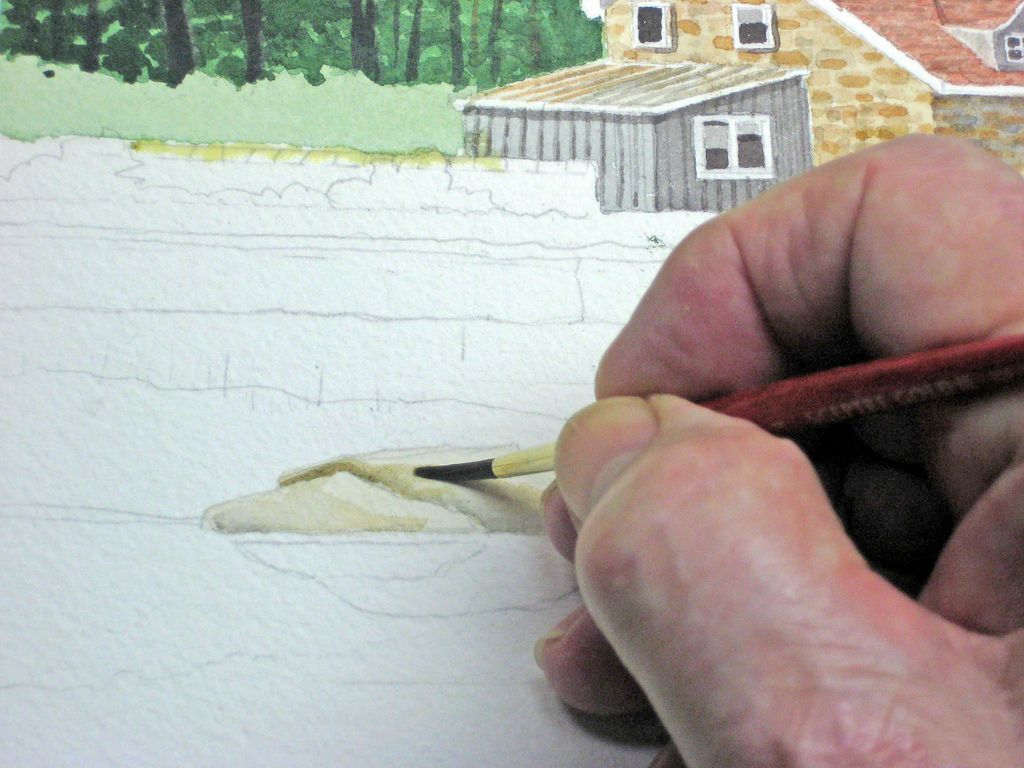
在我们地图在反思,我将块的岩石中间立场与光洗生黄土与触摸的棕色茜草和我们的阴影颜色。然后去了,会让一个人看起来洗背后的其他。您可以使用一个混合的颜色包括布朗茜草、黄赭,我们的阴影色,深蓝色的触摸——任何你感觉会给这些岩石崎岖和坚实的外观。极端特写图像扭曲我们如何看一幅画,所以总是记得退一步偶尔适当的观看距离。在这种情况下大约6到8英尺远。
原文如下:
Step 17
Next we begin blocking in the background trees, using the same technique from our recent tree project. Begin by selecting areas for negative painting. Note we have left out the lower hedge for later work. Use a #4 or 6 round brush loaded with colour. As these trees are in the background they will contain more blue than our foreground mix. With the cottage protected with liquid masking, you can paint quite freely up to the edge.Next we begin blocking in the background trees, using the same technique from our recent tree project. Begin by selecting areas for negative painting. Note we have left out the lower hedge for later work. Use a #4 or 6 round brush loaded with colour. As these trees are in the background they will contain more blue than our foreground mix. With the cottage protected with liquid masking, you can paint quite freely up to the edge.
Step 18
After the second layer blend all this with a wash of clean water using a 1/2″ square brush.
Step 19
With some emphasis on the lower trees were it gets darker, step back and view the results. You should gently soften the tops of the background trees and make sure there are no accidental shapes needing treatment.
Step 20
Now indicate some tree trunks as with did in our previous tree session. Keep the distant tree trunks smaller and thinner to indicate perspective and distance. Remove the liquid masking except from the lower wall.
Step 21
Block in the foreground tree with a #6 round or 1/2″ angle brush, with a wash made from Aureolin Yellow, Sap Green, a touch of Antwerp Blue and our basic shadow colour. Switch to a #4 round brush where the leaves meet the cottage and lake.
Step 22
Here is how it should look. Note some open areas in the foliage for the sky and tree branches to show up.
Step 23
Using our foliage technique again, block in the second layer with a #6 round brush. Darken the green with Antwep Blue and our shadow colour. Keep your brush fully loaded with colour at this stage.
Step 24
Here is the second layer, just as we did in our tree project.
Step 25
Our third layer uses a darker shade of green. Using a #6 round brush fully loaded with colour, start to pick out the negative painting areas as we did in our tree project. There is plenty of scope here for personal style as you try to create a smaller leaf structure than our previous foliage project. Dab on the colour and occasionally go back and drop some colour into partly dry areas. Keep stepping back to make sure the overall effect is what you want. When in doubt, half close your eyes and squint at it. This reduces the tonal values and helps you correct any obvious areas with improper colour or placement.
Step 26
Our third layer should look something like this.
Step 27
Our fourth layer is applied using a fully loaded #4 or #6 round brush, with a darkened mixture of our basic green. Once again, seek out those areas for our negative paining technique. How you do this will depend on your personal style. Keep stepping back to view your results. Don’t rush this.
Step 28
Hold your #4 or #6 brush as shown, keeping your wrist on the paper for maximum leverage, and with your fully loaded brush dab straight down. Go back occasionally to drop some of the colour in spots not quite dry to blend in the technique.
Step 29
This is how it should look at this stage. Later you may come back and modify this to suit your personal style. That will do for today. Tune in again for the remaining images.
Step 30
Now we begin blocking in the foreground tree trunk, using a wash of Raw Sienna, a touch of Brown Madder and darkened with our basic shadow mixture. Note the branches appear to go behind the foliage. Compare this to our original tree project for this technique
Step 31
Working on the tree trunk will give the plenty of opportunity to develop your own style and technique, but here I’m working wet-in-wet using a #4 round brush well loaded with a strong shadow colour made from Antwerp Blue and Brown Madder. At the base of the trunk I leave some negative painting areas for later grass to show up. Also note the messy spot beside my brush were I was careless. Never mind, with clean water and a scrub brush I can lift this out with our blot and lift technique. 300 lb. paper is very forgiving.
Step 32
The completed trunk and branches. Later modification may be needed depending on the finished painting. In this project there is plenty of scope for your own interpretation and these images are for your guidance only. Each student will bring a different approach, both in colour, tonal values and the general appearance. There is no “right” way to realism in watercolour, and the degree of realism will depend on what you decide to create.
Step 33
Before we map in the reflections, I’ll block in the middle-ground rocks with a light wash of Raw Sienna with a touch of Brown Madder and our shadow colour. Then go over with the washes that will make one look behind the other. You can use a mix of colours including Brown Madder, Raw Sienna, our shadow colour, a touch of Ultramarine – anything you feel will give these rocks rugged and solid look. The extreme close-up images distort how we actually look at a painting, so always remember to step back occasionally for proper viewing distance. In this case about six to eight feet away.


